How to Recover Data from a Mac That Won't Turn On
If your Mac won't turn on, your data is almost certainly still intact on the internal drive: the usual culprit is the logic board, power circuitry, or battery, not the storage. How you get the files back depends on the Mac: Intel models may allow Target Disk Mode or removal of a supported drive, while Apple Silicon (M1-M4) Macs need their original security hardware working to read internal storage.
How to recover the data:
- Intel Mac: use Target Disk Mode, or use a compatible enclosure if that model's drive is removable
- Apple Silicon (M1/M2/M3/M4): use Share Disk if Recovery starts; otherwise the original board may need repair
- FileVault enabled: you'll need the password to unlock the disk before any copy
- Time Machine backup: restore everything to a new Mac with Migration Assistant
If the board is dead or the storage is soldered, contact our MacBook data recovery lab for assessment.
If your Mac won't turn on, your data is almost certainly still intact on the internal drive. The screen might be black. The fans might be silent. You might press the power button twenty times and get nothing. That doesn't mean your files are gone. In most cases, the problem is the logic board, the power circuitry, or the battery. Not the storage. Your photos, documents, and projects are just sitting on that drive with no way to reach them through normal boot. The good news? There are several ways to recover data from a Mac that won't turn on, and some of them don't even require opening the machine.
We're MDrepairs, a professional data recovery lab in New Jersey. Ask about a Mac data recovery assessment. MacBooks, iMacs, Mac Minis, Mac Pros. Below, we'll walk through every option for getting your files back, starting with things you can try at home before moving into professional recovery.
On this page
Why Your Mac Won't Turn On
Before you panic about your data, it helps to understand why the Mac died in the first place. Because the reason it won't boot determines how you get the data off of it.
Most "dead Mac" situations fall into a handful of categories:
| Failure Type | Symptoms | Data Usually Safe? |
|---|---|---|
| Dead battery | No response at all, especially on older MacBooks | Yes. Battery has nothing to do with storage. |
| Bad charger or port | No charging indicator, no power | Yes. Just a power delivery problem. |
| Logic board failure | No power, or power with no display output | Yes. Drive is separate from the logic board (mostly). |
| Liquid damage | Worked fine, then died after a spill | Usually yes, unless liquid reached the SSD directly. |
| SSD failure | Folder with question mark, or no boot at all | Depends. Needs professional evaluation. |
| Software corruption | Stuck on Apple logo, progress bar loops | Yes. Data is there, OS just can't load. |
A Mac can fail to power on even when the storage is still readable. The Mac won't turn on because something else failed. And if the drive is fine, your data is fine. We just need to find a way to access it.
Quick Fixes to Try First
Before you start pulling drives out of your Mac or calling a lab, run through these. You'd be surprised how often one of these solves the problem entirely.
1 Check the Basics
Try a different power outlet. Use a different charging cable if you have one. If you're using a USB-C MacBook, try each port. One port might be dead while another works fine. Leave it plugged in for at least 30 minutes. A completely drained battery can sometimes take a while before the Mac responds to the power button.
2 Force Restart
Hold the power button for a full 10 seconds. Not 5. Not 7. Count to 10. Then release, wait 5 seconds, and press it again normally. On MacBooks with Touch ID, the power button is the Touch ID sensor in the top right of the keyboard.
3 Reset the SMC (Intel Macs Only)
The System Management Controller handles power management. If it gets confused, your Mac might refuse to turn on even though the hardware is fine.
- MacBook with T2 chip (2018+): Shut down. Hold
Control + Option + Shift(left Control and Option, right Shift) for 7 seconds, then also hold the power button for another 7 seconds. Release everything. Wait a few seconds, then press power. - MacBook without T2 (pre-2018): Shut down. Hold
Shift + Control + Optionand the power button simultaneously for 10 seconds. Release. Press power. - Desktop Mac (iMac, Mac Mini, Mac Pro): Unplug from power. Wait 15 seconds. Plug back in. Wait 5 seconds. Press power.
4 Reset NVRAM/PRAM (Intel Macs Only)
Turn on the Mac and immediately hold Option + Command + P + R. Keep holding for about 20 seconds. On older Macs you'll hear the startup chime twice. On T2 Macs, hold until the Apple logo appears and disappears for the second time.
5 Try an External Display
Sometimes the Mac is actually on but the display is dead. Connect an external monitor via HDMI, Thunderbolt, or USB-C. If you see your desktop on the external display, your Mac is fine. The screen just needs repair. Your data isn't at risk at all.
None of these steps put your data at risk, so there's no downside to trying them all. If your Mac comes back to life, great. Back up everything immediately before it dies again.
Target Disk Mode and Share Disk (Intel vs Apple Silicon)
This is one of the best ways to recover data from a Mac that won't turn on normally. You basically turn the dead Mac into an external hard drive and connect it to a working Mac.
Intel Macs: Target Disk Mode
Target Disk Mode has been around forever and it's incredibly useful. Here's how it works:
- Connect your dead Mac to a working Mac using a compatible Thunderbolt cable, or (on very old models) FireWire.
- Power on the dead Mac while holding the T key.
- If it works, you'll see a big Thunderbolt symbol on the dead Mac's screen.
- The dead Mac should appear as an external drive on the working Mac's desktop.
- Drag your files over. Done.
The catch? Target Disk Mode requires the Mac to have enough power to spin up the logic board, even if macOS won't boot. If the logic board is completely dead, this won't work. But if the Mac died from a software issue, a corrupted OS, or a failed update, Target Disk Mode often saves the day because it bypasses macOS entirely.
Apple Silicon Macs: Share Disk
Apple replaced Target Disk Mode with something called "Share Disk" on M1/M2/M3/M4 Macs. It's similar but works differently.
- Connect both Macs with a USB-C or Thunderbolt cable.
- On the dead Mac, press and hold the power button until you see "Loading startup options."
- Click Options, then go to Utilities > Share Disk.
- Select the disk to share and click Start Sharing.
- On the working Mac, open Finder. The shared disk should appear in the sidebar under Network.
The problem with Share Disk is that it needs the Mac to reach the recovery environment. If the machine is truly dead (won't respond to the power button at all), Share Disk isn't going to help. Also, if FileVault is enabled, you'll need the password to unlock the disk before sharing it.
Removing the Drive and Using an Enclosure
If Target Disk Mode or Share Disk doesn't work, the next option is physically removing the storage drive and connecting it to another computer. Whether this is possible depends entirely on which Mac you have.
Macs Where You Can Remove the Drive
| Mac Model | Drive Removable? |
|---|---|
| MacBook Pro (pre-2016) | Yes, but the drive type varies: SATA on non-Retina models, proprietary Apple SSD modules on Retina models. |
| MacBook Air (2010-2017) | Yes. Proprietary Apple SSD stick. Needs a special adapter. |
| MacBook Pro (2013-2015) | Yes. Proprietary Apple SSD. Needs an enclosure compatible with the exact Apple SSD. |
| iMac (all years) | Not every iMac. Confirm the model has removable storage before opening the display. |
| Mac Mini (pre-2014) | Yes. Standard 2.5" drive. Accessible from the bottom panel. |
| Mac Pro (older SATA towers) | Yes. Standard SATA drives. Easiest Mac to open. |
Macs Where the Storage is Soldered
Starting in 2016 for MacBook Pros and 2018 for MacBook Airs, Apple began soldering the SSD storage directly to the logic board. This means you can't just pop the drive out and read it in an enclosure. The storage chips are physically part of the motherboard.
M1, M2, M3, and M4 MacBooks have soldered storage. Some desktop Macs use removable modules, but their encrypted data still depends on the original security hardware.
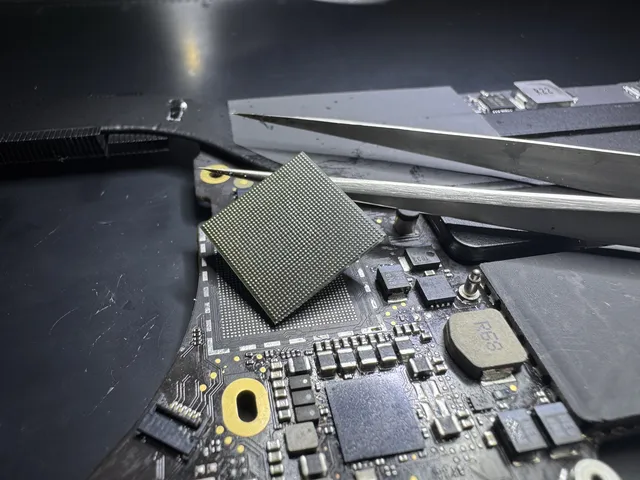
If you have one of these Macs and it won't turn on, your options are more limited. Target Disk Mode (or Share Disk) is your best bet. If that fails, you're looking at professional recovery where a technician needs to work with the logic board directly to access the NAND flash chips.
If You Can Remove the Drive
For older Macs with removable drives, the process is straightforward:
- Open the Mac and carefully disconnect the drive. YouTube has teardown videos for every Mac model. iFixit guides are also excellent.
- Get the right enclosure or adapter. For 2.5" SATA drives, any USB 3.0 SATA enclosure works (they're $10-15 on Amazon). For proprietary Apple SSDs, you need a specific adapter. Search for your exact Mac model to find the right one.
- Connect it to a working Mac. The drive should mount on the desktop. If it doesn't show up in Finder, open Disk Utility and check if it appears there. An unmounted but visible drive can often be mounted manually.
- Copy your files. Drag everything you need to the working Mac's internal drive or an external backup drive.
macOS Recovery Mode
Recovery Mode is built into every Mac. It loads a minimal version of macOS from a separate partition (or from the internet on newer machines). If your Mac can reach Recovery Mode, you can often access your files without booting into the full OS.
How to Boot into Recovery Mode
Intel Macs: Power on and immediately hold Command + R. Keep holding until you see the Apple logo or a spinning globe.
Apple Silicon Macs (M1/M2/M3/M4): Press and hold the power button (don't just tap it). Keep holding until you see "Loading startup options." Then click Options and hit Continue.
What You Can Do in Recovery Mode
Once you're in Recovery Mode, go to the menu bar and click Utilities > Terminal. From Terminal, you can copy files to an external drive:
Copy files via Terminal in Recovery Mode
Plug in an external USB drive. Then in Terminal:
- Find your external drive:
ls /Volumes/ - Navigate to your user folder, substituting the mounted data volume and your username:
cd "/Volumes/YourDataVolume/Users/yourusername/" - Copy files, substituting your external drive's name:
cp -R Documents/ "/Volumes/YourExternalDrive/Recovery/" - Repeat for Desktop, Pictures, Downloads, or whatever folders you need.
You can also use Disk Utility in Recovery Mode to check the health of your internal drive. If the drive shows up but won't mount and holds your only copy, make a full drive backup first, or use read-only recovery and save files to another drive. Then try First Aid; its filesystem repairs can change the drive.
If macOS Recovery won't load at all (you just get a black screen or the Mac shuts itself off), the problem is deeper than software. That usually points to a logic board or power issue.
Restoring from Time Machine Backups
If you were using Time Machine before your Mac died, this might be the easiest recovery path. Time Machine keeps hourly backups for the past 24 hours, daily backups for the past month, and weekly backups until the backup drive is full.
How to Access Time Machine Backups
Your Time Machine backup lives on an external drive or a network drive (like an old AirPort Time Capsule). You don't need the dead Mac at all to access these files.
- Connect the Time Machine drive to a working Mac.
- Open the drive in Finder. If it contains Backups.backupdb, open that folder and continue below. Otherwise, use Migration Assistant as described after these steps.
- Find your Mac's folder (it's named after the machine).
- Open the dated folders to find the snapshot closest to when your Mac died.
- Navigate to the Users folder and grab your files.
You can also use Migration Assistant on a new Mac to restore everything from a Time Machine backup. It'll pull over your apps, settings, user accounts, and all your files. It's the closest thing to cloning your old Mac onto a new one.
iCloud is another option if you had iCloud Drive, iCloud Photos, or Desktop & Documents syncing enabled. Log into icloud.com from any browser to check what's there. Even if you didn't consciously set it up, macOS nudges you to enable iCloud during initial setup, so you might have more synced than you think.
The T2 and Apple Silicon Problem
This is the section nobody wants to read. But if you've got a Mac from 2018 or later, you need to understand this.
What the T2 Chip Changed
Starting with the 2018 MacBook Pro, Apple added the T2 security chip. This chip encrypts the internal SSD automatically. Always. Even if you never turned on FileVault. The encryption key is stored on the T2 chip itself, which lives on the logic board.
Some older devices with unencrypted, supported storage permit independent chip or ISP reads. Age alone does not establish that: model, software version, actual security configuration, and storage health matter. Modern encrypted devices require their original hardware/security path and appropriate unlock credentials; chip-off does not bypass those requirements.
Apple Silicon Takes It Further
M1, M2, M3, and M4 Macs don't have a separate T2 chip because the encryption engine is built directly into the main processor. Same problem, though. The storage is always encrypted and tied to that specific processor.
This means:
- Moving encrypted storage to another machine won't unlock it; the original security hardware is required, even on models with removable modules.
- If the processor is damaged, accessing the encrypted data becomes nearly impossible.
- The logic board must be at least partially functional to decrypt and access the data.
What About Older Macs?
Pre-2018 Macs without a T2 chip don't have this encryption problem (unless you manually enabled FileVault). On models with removable storage, the SSD or HDD can be connected to a compatible enclosure. Soldered-storage models still need board access. That's why data recovery from older Macs is generally easier and cheaper.
When You Need Professional Lab Recovery
Some dead Mac situations just can't be solved at home. Here's when you need to send it to a lab like ours.
Situations That Require Professional Recovery
- The Mac is completely unresponsive. No lights, no sounds, no fan spin. Won't enter Target Disk Mode or Recovery Mode. Nothing.
- Liquid damage. Coffee, water, soda. If liquid got inside, corrosion can spread to the SSD or its controller. Every day you wait, corrosion gets worse.
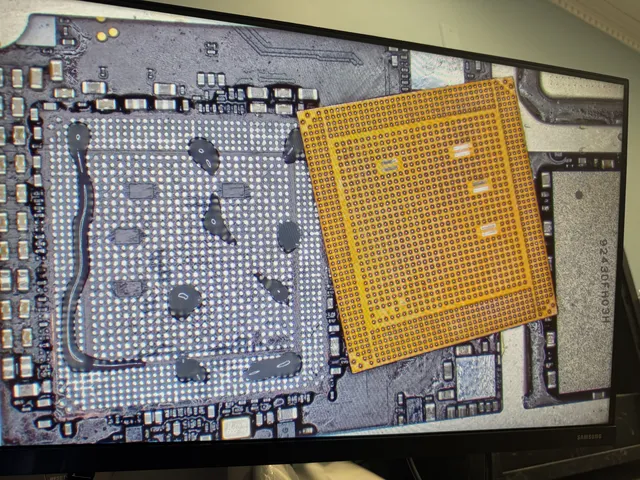
- T2 or Apple Silicon Mac with a dead logic board. The data is encrypted and tied to that board. A tech needs to repair the board enough to extract data.
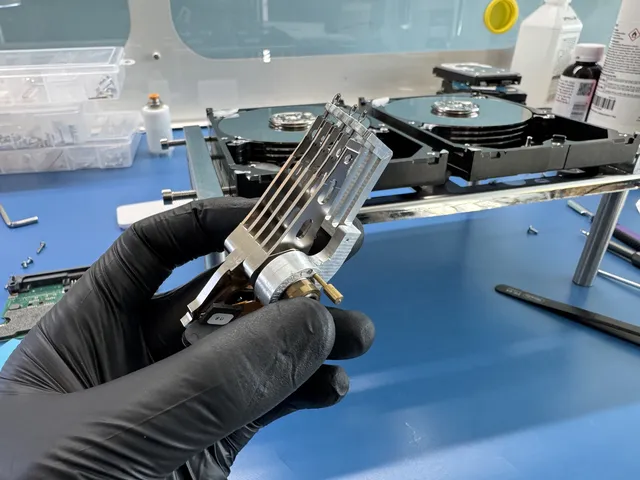
- Clicking, grinding, or beeping sounds. These indicate physical damage to a spinning hard drive (in older Macs or Fusion Drive models). This work needs a clean, filtered area.
- You already tried opening it and something went wrong. Torn ribbon cable, stripped screws, cracked display.
- SSD failure. The drive itself died, not just the Mac around it. Recovery depends on the storage design and failure; encrypted models still need their original security hardware.
How Professional Mac Recovery Works at MDrepairs
Here's our actual process. No mystery, no black box.
1 Diagnostic
You ship us the Mac (or drop it off if you're in New Jersey). We evaluate the machine and figure out exactly what failed and what it'll take to get your data. This evaluation comes first. Always.
2 Quote and Approval
We tell you what's wrong, what we can recover, and what it costs. You decide whether to proceed. If you say no, we ship it back. The $100 diagnostic fee is credited toward a successful recovery and stays non-refundable once diagnostics start. Donor drives or replacement parts that you approve are non-refundable once ordered, even if recovery fails. Your approval of the estimate is required before recovery work begins.
3 Recovery
Depending on the failure, we might:
- Repair the logic board enough to boot and extract data
- Remove the SSD and read it directly (older Macs)
- An intact NAND package is not sufficient to recover an encrypted SSD. Rebuilding page order, ECC, or the flash translation layer does not supply missing keys. Preserve the original electronics; only a specifically supported method or repairable original read path can make extraction possible.
- Perform head and platter work in a laminar-flow work area on Fusion Drives with physical damage
4 File Verification and Delivery
We generate a file listing so you can verify everything is there. Then we transfer your data to a new external drive and ship it back to you (or you pick it up).
What NOT to Do with a Dead Mac
Don't Keep Trying to Turn It On
If your Mac died from liquid damage or a short circuit, repeatedly pressing the power button can cause further electrical damage. Each power-on attempt sends current through the board. If there's a short somewhere, you're cooking components every time you try.
If liquid damage or a short is suspected, don't make another power-on attempt.
Don't Open It If You're Not Sure What You're Doing
Modern MacBooks are not designed to be user-serviceable. The screws are tiny. The ribbon cables are fragile. The battery is glued in. If you've never opened a MacBook before, watching one YouTube video doesn't make you ready.
Don't Take It to a General Repair Shop for Data Recovery
Most computer repair shops are great at replacing screens and batteries. Data recovery from a dead logic board is a completely different skill set. It requires microsoldering stations, schematics, donor boards, and experience that general repair shops don't have. If they attempt it and fail, they can reduce the chance of a professional lab succeeding afterward.
Don't Put It in Rice
Seriously. If your Mac died from liquid damage, rice does nothing. Rice doesn't absorb moisture from inside a sealed aluminum chassis. It doesn't neutralize corrosion. It just wastes time while corrosion spreads across the board. If liquid is involved, the machine needs to be opened and the board needs to be cleaned with isopropyl alcohol and an ultrasonic cleaner. The sooner the better.
Don't Use Data Recovery Software on the Dead Mac
Software-based data recovery tools like Disk Drill or Data Rescue are useful when the Mac boots but a file was accidentally deleted. They're useless when the Mac won't turn on at all. You can't run software on a machine that doesn't power on. If someone tells you to "just run data recovery software," they're not understanding the problem.
How Much Does Mac Data Recovery Cost?
It depends on what's wrong. Here are rough ranges so you know what to expect:
| Scenario | Typical Cost Range |
|---|---|
| Drive removal + enclosure (older Mac, DIY) | $10-30 for the enclosure/adapter |
| Drive removal + enclosure (professional) | $100-300 |
| Logic board repair for data extraction | $300-900 |
| Chip-off SSD recovery | $500-1,500 |
| Head and platter work (Fusion Drive / HDD) | $400-1,200 |
| T2/Apple Silicon encrypted recovery | $500-1,500+ |
These are industry averages. The actual cost depends on the specific failure, the Mac model, and how much data needs to be recovered. At MDrepairs, we always give you a firm quote after the diagnostic. No surprises.
Recovery Options by Mac Model
Not every method works for every Mac. Here's a quick reference so you don't waste time on approaches that won't work for your specific machine.
| Mac Model | Best Recovery Method | Notes |
|---|---|---|
| MacBook Pro 2012 or older | Remove drive, use a model-compatible enclosure | Non-Retina models use SATA; Retina models use proprietary Apple SSDs. |
| MacBook Pro 2013-2015 | Remove SSD, use Apple SSD adapter | Proprietary connector but removable. |
| MacBook Pro 2016-2017 | Target Disk Mode | Non-Touch Bar models have removable SSDs; Touch Bar models have soldered storage. |
| MacBook Pro 2018-2020 (Intel) | Target Disk Mode or professional recovery | T2 encryption. SSD soldered to the logic board. |
| MacBook Pro M1-M4 | Share Disk or professional recovery | Storage soldered and encrypted. No DIY removal option. |
| MacBook Air 2010-2017 | Remove SSD, use adapter | Proprietary Apple SSD. Adapters available online. |
| MacBook Air 2018+ (Intel) | Target Disk Mode or professional | T2 encrypted, soldered storage. |
| MacBook Air M1-M4 | Share Disk or professional recovery | Soldered and encrypted. Same as M-series Pro. |
| iMac (any year) | Target Disk Mode on Intel; Share Disk on Apple Silicon | Drive removal depends on the exact model; check before opening the display. |
| Mac Mini (pre-2014) | Remove 2.5" drive from bottom panel | Very easy to open. Standard SATA. |
| Mac Mini M1-M4 | Share Disk or professional recovery | Encrypted storage. Module design varies by model; original security hardware is required. |
Preventing This from Happening Again
After recovery, keep separate backups of your files.
Time Machine. Just Do It.
Buy an external drive. Plug it in. Say yes when macOS asks if you want to use it for Time Machine. That's it. You're done. You now have automatic hourly backups. The drive can stay plugged in all the time, or you can plug it in once a week. Either way, you'll have backups.
A 2TB external drive costs $60-80. That's the cheapest insurance you'll ever buy for your data.
Turn On iCloud
Enable iCloud Drive and Desktop & Documents syncing. Go to System Settings > Apple ID > iCloud > iCloud Drive and make sure it's on. This automatically syncs your Desktop and Documents folders to iCloud. Even if your Mac and your Time Machine drive both fail simultaneously (unlikely but possible), your files are still in the cloud.
Consider a Cloud Backup Service
Backblaze backs up your entire Mac continuously for $9/month. It runs in the background, you don't have to think about it, and it backs up everything including external drives. It's different from iCloud because it's a true backup (keeps deleted files for 30 days, keeps previous versions) rather than just syncing.
The ideal setup: Time Machine for local backups (fast restores) plus Backblaze or iCloud for off-site backups (protection against theft, fire, flood). Belt and suspenders.
If this helped, these guides cover related scenarios we see in the lab:
Frequently Asked Questions
Can you recover data from a Mac that won't turn on at all?
If the Mac won't power on, it usually means the logic board, battery, or power circuitry failed. The internal drive is typically unaffected. For older Macs, we can remove the drive and read it directly. For newer Macs with soldered, encrypted storage, we can often repair the logic board enough to extract the data. Recovery prospects depend on the fault and access to the original data.
Is the data encrypted if I never turned on FileVault?
On Macs from 2018 and later (those with a T2 chip, or any M1/M2/M3/M4 Mac), yes. The data is automatically encrypted by the security chip even if you never enabled FileVault. FileVault adds a login password requirement on top of that encryption, but the hardware-level encryption is always active. On pre-2018 Macs without a T2 chip, data is not encrypted unless you manually enabled FileVault.
How long does Mac data recovery take?
Board-level recovery aims to preserve the original storage and its required security components while restoring a usable path to the files. A new logic board or raw NAND dump does not supply the original keys. The exact device, damage, and security state determine whether extraction is possible.
Can I recover data from a water-damaged MacBook?
Liquid damage is one of the most common reasons MacBooks die. The key is acting quickly. Corrosion starts spreading across the logic board within hours of the spill. Turn the Mac off immediately (don't try to use it), don't plug it in, and get it to a professional as soon as possible. The longer you wait, the more damage the corrosion causes. We clean the board with an ultrasonic cleaner and repair damaged traces to recover data from liquid-damaged Macs.
What if my Mac has a Fusion Drive?
Fusion Drives combine a small SSD with a larger traditional hard drive. macOS treats them as a single volume. If the Mac won't turn on, recovery is possible but slightly more complex because data is split across two physical drives. Both drives need to be recovered and their data recombined. This is straightforward for a professional lab but not something you can easily do at home.
Can Apple recover my data?
No. Apple does not offer data recovery services. If you bring a dead Mac to the Apple Store or an Authorized Service Provider, they'll offer to replace the logic board (which may erase your data) or sell you a new Mac. They won't try to recover your files. Apple's official recommendation is to keep backups via Time Machine or iCloud. For actual data recovery from a dead Mac, you need a third-party data recovery lab.
Is it worth recovering data from a very old Mac?
That depends on what's on it. From a technical standpoint, older Macs (pre-2016) are actually the easiest and cheapest to recover. Many have removable drives, but Retina MacBook Pro SSDs need a compatible enclosure, and FileVault still needs your password or recovery key. A 2012 MacBook Pro with a failed logic board? A removable drive makes that a simpler recovery job. The question is whether the files on it are worth the cost of recovery to you. Family photos you can't replace? Absolutely worth it. Old work documents you can re-download from email? Maybe not.
When DIY stops being safe
If your Mac will not turn on after basic charger, cable, port, force restart, and recovery mode checks, the next move should protect the data rather than chase power at any cost. Modern Macs often use encrypted, soldered storage that depends on the logic board working well enough to authenticate and read the drive. Liquid damage, no image, no fan activity, repeated restart chimes, or a Mac that warms up but never boots can point to board-level failure. Repeated charging and power cycling can make that failure harder to stabilize.
MDRepairs provides MacBook data recovery for dead Intel, T2, and Apple Silicon machines in a real NJ lab. Customers in the contiguous US can start with insured mail in data recovery, including a prepaid inbound shipping label and a free phone consult.
Get help with data recovery
Bring your device to our Lincroft lab during opening hours, or mail it in.
How to mail your deviceThe $100 diagnostic is non-refundable once diagnostics start, and donor drives or replacement parts you approve are non-refundable once ordered, even if recovery fails.
Published by MDrepairs
MDrepairs is a data recovery and electronics repair lab in Lincroft, New Jersey. Our founder and lead technician Joseph Montanti films real cases for our YouTube channel, showing tools, repair steps and recovery outcomes.
Keep reading
- External Drive Keeps Ejecting on Mac? Sonoma/Sequoia Fix
- iMac Fusion Drive Failing? Recovery Is Trickier
- Apple Silicon Data Recovery: What M-Series Changed