How to Recover Data from a Broken MacBook Pro
Our founder and lead technician, Joseph Montanti, handles cases personally.
A broken MacBook Pro may still hold your files, but the exact model and fault decide how you can reach them. A working Mac with only a failed screen may let you copy files using an external display. Supported older models have removable storage; Touch Bar, T2, and Apple silicon models need a working path through their original board.
On this page
A broken screen or a Mac that will not power on?
If the Mac starts and only its display is broken, connect a compatible external monitor. Use an external keyboard or mouse if those controls are damaged. When you can log in and open your folders, copy the documents, photos, and other files you need to another drive before installing updates or doing repairs. Stop that transfer if the Mac repeatedly restarts or its storage disconnects or produces read errors.
Physical damage needs a different route. Disconnect power from a liquid-damaged, burned, swollen, or electrically unstable Mac; a dropped or noisy mechanical hard drive also stays off. Have the damaged hardware checked before further startup attempts.
For a dry Mac with no signs of physical damage, Apple's no-power checks start with a working power connection and removing accessories that might interfere with startup. Hold the power or Touch ID button for about 10 seconds, release it, then press it normally. A machine that still shows no response needs its power path checked.
A flashing question-mark folder means the Mac cannot find an available startup disk or a working macOS installation. It can appear with either a storage fault or a startup-software problem. Our question-mark folder guide covers that situation; a physically dead Mac requires a different approach from one already reaching a startup screen.
Before paying for recovery, check any Time Machine backup and synced iCloud files from another working Mac. A verified copy of the folder you need can remove the need to access the broken machine. Files outside the folders you synced still depend on a backup or the original storage.
Identify the MacBook and its storage design
The year is useful, but the full model name matters more. Two MacBook Pros sold in the same year can have different storage. Apple's MacBook Pro identification page lists the model names and identifiers.
- If the Mac runs, open About This Mac from the Apple menu. Check the complete model name and whether it has an Intel processor or an Apple chip.
- If it will not start, find the serial number on the underside or original packaging. Enter it on Apple's coverage site to identify the model. The underside also carries an A-model number, such as A1708, which you can match to the table below.
- For a 2016 or 2017 MacBook Pro, distinguish the two-port model with physical function keys from the Touch Bar models before choosing any SSD-removal route.
| MacBook Pro model | Storage design | Route to the files |
|---|---|---|
| Older non-Retina models with a SATA drive | Removable hard drive or SSD | Read a healthy drive through a matching SATA connection |
| Retina models through 2015 | Removable proprietary SSD module | Use a reader matching that Apple SSD generation |
| 2016/2017 A1708, without Touch Bar | Removable proprietary SSD, different from earlier Retina modules | Use a connection specifically supporting the original A1708 module |
| 2016/2017 A1706 and A1707, with Touch Bar | Flash soldered to the logic board | Restore board access or use Target Disk Mode if the Mac can start |
| Intel models with T2 | Soldered flash with hardware-bound encryption | Preserve the original storage and T2 security path |
| Apple silicon models | Soldered flash; controller and security functions in the M-series chip | Use a working original board to unlock and transfer files |
The MacBook Air and the 12-inch Retina MacBook do not follow every Pro-era boundary. Wedge-shaped Air models through 2017 have removable storage; Retina Intel Air models from 2018 have soldered storage and the T2 chip. The 12-inch Retina MacBook has soldered storage starting with the 2015 model, so a pre-2016 date is not enough to choose SSD removal. An adapter listing must identify the actual supported drive; “for MacBook” is too broad.
Reading a removable MacBook drive
A healthy removable drive can be read independently of a failed laptop board. This is the route for recovering data from a MacBook Pro hard drive when the computer has failed but the drive has survived. FileVault credentials still apply after removal.
For Retina SSDs, match both the connector and the storage protocol. Early Retina SATA modules and later PCIe modules use different readers. The manufacturer lists those separately in the OWC Envoy Pro compatibility guide. A small adapter for installing a generic M.2 SSD inside a Mac does a different job from an enclosure that reads the original Apple SSD outside it.
On a dry, undamaged removable-storage model, the basic removal sequence is:
- Shut the Mac down and unplug its charger. Follow the exact model's bottom-cover procedure with the correct screwdriver.
- Disconnect the battery as that procedure directs before touching the storage connector.
- Remove the SSD retainers and lift or slide the module out in the direction shown for that model. Keep screws and brackets with the machine.
- Fit the module into its compatible reader, connect it to a working Mac, unlock it if prompted, and save readable files onto separate storage.
The A1708 has extra disassembly steps around its proprietary module. The SSD manufacturer provides a model-specific Aura Pro NT installation demonstration for the 2016/2017 non-Touch Bar machines. Use its removal portion for that hardware, rather than applying an earlier Retina procedure. Fitting replacement storage and reinstalling macOS are separate jobs after recovery.
OWC's hands-on Touch Bar inspection confirms the soldered storage in those models. There is no removable A1706/A1707 SSD for an ordinary enclosure. Their service connection also does not make the chips into a pull-out drive.
If the removed SSD is unreadable, removal has only separated it from the laptop. It may still have its own electrical, controller, or memory fault. Software needs readable storage. For a stable drive that will not mount, use Disk Drill's Byte-to-byte Backup to save an image on a different drive, then recover files from that image. First Aid, formatting, and reinstalling come after the needed files are secure. Storage that stalls or drops out belongs with a recovery technician.
Transfer files through another Mac
A Mac can sometimes present its files to another computer even when its normal macOS startup is broken. Intel Macs use Target Disk Mode. Apple silicon Macs use Share Disk in macOS Recovery. Both require the affected machine to power up far enough to read its storage.
Target Disk Mode on an Intel Mac
Apple's Target Disk Mode instructions use a Thunderbolt connection. A USB-C charging cable can have the same plug shape without supporting that connection.
- Connect the Intel Mac to a working Mac with the appropriate Thunderbolt cable.
- Start the affected Mac while holding T. Its disk should appear on the other Mac once Target Disk Mode starts.
- Open the disk in Finder and supply a valid unlock password if requested. Drag the needed folders onto the working Mac or another drive.
- Eject the source volume in Finder, shut down the Mac used as a disk, and disconnect the cable.
Share Disk on an Apple silicon Mac
Apple's Share Disk procedure shares files over a data cable. It does not expose the internal SSD as a raw disk for sector imaging.
- Join the Macs with a USB, USB-C, or Thunderbolt data cable. On the affected Mac, hold the power button from shutdown until startup options appear.
- Select Options, then Continue, and authenticate when asked.
- In Recovery, choose Utilities, then Share Disk. Select the volume and start sharing it.
- On the working Mac, open Finder's Network view. Open the sharing Mac, choose Connect As, and connect as Guest.
- Copy the files to the destination Mac or a separate drive. Eject the shared volume when finished, then choose Stop Sharing on the source Mac.
Guest access on the receiving Mac follows authorization on the source Mac. It is not a way around an encrypted, locked volume. If the affected Mac cannot reach its sharing mode, changing cables will not repair a failed power circuit.
T2, Apple silicon, and FileVault
On T2 and Apple silicon Macs, internal storage is encrypted even when FileVault is off. FileVault adds password protection to the keys used for unlocking it. Apple's volume-encryption documentation explains how the hardware identity participates in protecting those keys.
The M-series chip's unified memory is RAM used while programs run. Your saved documents live in separate NAND flash packages on the board. The storage controller and Secure Enclave are part of the processor system, so desoldering the NAND and moving it elsewhere does not recreate the original decryption path.
A shorted component elsewhere on the board can leave the processor and storage usable after repair. Permanent destruction of the required security hardware or encryption information is a different limit. The distinction is between a board that cannot currently power up and the loss of the components that make decryption possible.
For FileVault, first use an authorized account password or the saved recovery key. If you have forgotten the login password, check the reset options that the Mac offers; an Apple Account route must have been configured for it. Account recovery does not automatically produce a missing FileVault key.
- Look in your password manager, saved setup records, or your organization's recovery-key records.
- On a supported iPhone or iPad signed into the same Apple Account, open Passwords, choose All, then the Mac's name. Reveal its Recovery Key field if present.
- Use that key in the Mac's supported unlock or password-reset process.
Apple documents the Passwords recovery-key route. It is useful when the key was saved and synced; a Mac's key will not necessarily be listed on every account or older system.
When the original board needs repair
A MacBook with soldered storage that cannot power up needs its board fault located. Replacing the complete board replaces the storage with it. For data recovery, the work aims to restore access through the board holding your files.
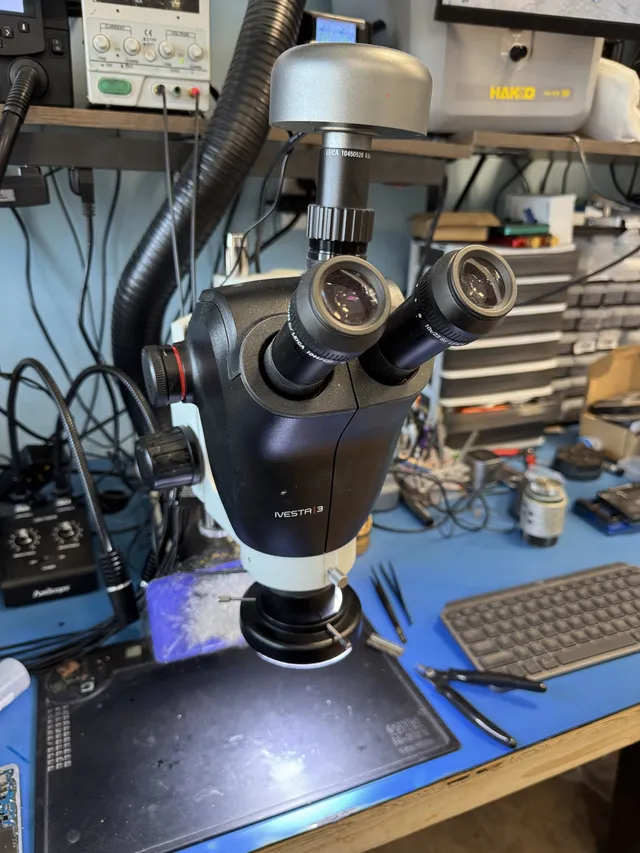
In this MacBook component repair, Joe located a hot component with a thermal camera and examined it under a microscope. Removing it cleared the short, and a replacement restored power. A failed component in the power path can keep an otherwise usable machine from starting.
The price table reflects the different work involved in MacBook data recovery:
| Recovery work | Typical cost |
|---|---|
| SSD removal on a confirmed removable-storage model | $1,000 to $1,500 |
| Target Disk or Share Disk transfer | $1,500 |
| DFU Revive followed by file transfer, if successful | $1,500 |
| Board-level repair and data extraction | $1,500 |
| Complex liquid damage recovery | $1,500 to $3,500+ |
The $100 diagnostic is credited toward successful recovery, and recovery work begins after you accept the estimate. The standard recovery estimate is 4–6 weeks; parts and the condition of the machine can change the schedule.
A recovery repair and a repair for long-term use can involve different work. A usable display, battery, keyboard, and undamaged housing may still be needed after file access returns. Decide on that work once you know the files have been copied and can be opened.
DFU Revive and Restore do different jobs
After certain interrupted installations, T2 and Apple silicon Macs may need firmware repair. Apple's DFU procedure separates Revive, which preserves data, from Restore, which erases the Mac. DFU is a servicing connection rather than access to your folders.
With your files already safe, the reader procedure is:
- Use an internet-connected second Mac running macOS Sonoma or later. Connect both to power.
- Connect a USB-C cable supporting data and charging to the affected Mac's designated DFU port. Apple excludes Thunderbolt 3 cables for this procedure.
- Follow Apple's laptop key sequence: power off, press and release Power, then hold left Control, left Option, right Shift, and Power. Follow the model's different T2 or Apple silicon timing in the linked instructions.
- In the host Mac's Finder DFU window, select Revive Mac. Keep the host awake while it runs.
For a machine holding the only copy, firmware work needs to be weighed against the underlying fault before proceeding. A failed Revive is no reason to select Restore while files are still needed.
Mac hard drive failure and file-system damage
On an older MacBook with a mechanical hard drive, the drive itself can fail independently of the computer. Repetitive clicking can come from failed read attempts; a damaged head assembly or recording surface needs physical recovery work before sustained reading. Removing that drive into an enclosure does not repair those parts.
A readable disk with a damaged file system presents a different job: preserve an image on healthy storage, then recover the file structure from the copy. Apple's First Aid instructions start with having a current backup. First Aid changes file-system structures and belongs after the files or image are safe.
The same storage distinction matters for Apple desktop computers. A Fusion Drive in an iMac or Mac mini combines an SSD and a hard drive into one volume. Preserve both components if that volume has failed. Apple's split-Fusion repair erases both drives when it creates the combined volume again; it is a rebuilding procedure after recovery, not a way to retrieve the existing files.
Get help with data recovery
Bring your device to our Lincroft lab during opening hours, or mail it in.
How to mail your deviceThe $100 diagnostic is non-refundable once diagnostics start, and donor drives or replacement parts you approve are non-refundable once ordered, even if recovery fails.
Published by MDrepairs
MDrepairs is a data recovery and electronics repair lab in Lincroft, New Jersey. Our founder and lead technician Joseph Montanti films real cases for our YouTube channel, showing tools, repair steps and recovery outcomes.
Keep reading
- Soldered Laptop SSD? Your Recovery Options Explained
- iMac Fusion Drive Failing? Recovery Is Trickier
- Apple Silicon Data Recovery: What M-Series Changed