Mac Stuck on Gray Screen After macOS Sequoia Update? Recovery Steps
Our founder and lead technician, Joseph Montanti, handles cases personally.
A gray screen during the macOS Sequoia update process can be a pause in installation or a Mac failing to finish startup. If the installer is still progressing, give it time; Apple says the progress bar can pause for long periods and installation may need overnight. If startup keeps failing, use Safe Mode or macOS Recovery to regain access and copy your files before repairing or reinstalling.
On this page
Is Sequoia still installing, or has startup failed?
Apple's startup-screen guidance shows the logo and progress bar. A blank screen can appear between them. Watch for progress, repeated restarts or an error message to distinguish the next step.
A Mac that repeatedly returns to the Apple logo is restarting before it completes startup. If it displays “Your computer restarted because of a problem,” macOS has reported a kernel panic: an error severe enough to force a restart. Apple lists both software and hardware causes, including connected devices.
If Finder opens, even briefly or only in Safe Mode, copy the folders you need onto a separate drive, then open the copies to check them. Stop if the Mac shuts down during the transfer or loses sight of its disk.
For a stalled start after allowing installation time, hold the power button down for up to ten seconds, then turn the Mac on again. If the fault persists, disconnect nonessential peripherals such as hubs and printers before the next start. Avoid forcing it off over and over during startup.
Keep the only copy out of the repair attempt. Do not run First Aid, reinstall, erase or restore firmware on the only accessible copy of files you still need.
Try Sequoia Safe Mode for a usable desktop
Safe Mode helps identify trouble caused by software that loads at startup. It is particularly useful when the Mac showed a login screen before going gray, or when startup changed after installing an app or its supporting software. Apple's Safe Mode instructions differ by processor.
- M1 and other Apple silicon Macs: shut down. Keep the power button pressed until the startup options load, select your startup volume, then use Shift and Continue in Safe Mode.
- Intel Macs: hold Shift immediately as the Mac starts. Release it at the login window, then sign in. You may be asked to sign in a second time.
If Safe Mode works, investigate startup software after that copy is secure. If it also fails, move to Recovery rather than assuming a particular extension caused the problem. The processor-specific entry steps below are the same for Sequoia recovery on a MacBook, iMac or Mac mini.
Use Recovery to reach the files
Recovery is the Mac's built-in recovery environment. It can open even when the installed operating system cannot finish starting. You will need an authorized password or recovery method to unlock protected storage.
- On Apple silicon, hold the power button from shutdown until startup options appear, then choose Options and Continue. Authenticate when requested.
- On Intel, start while holding Command-R. Keep holding until the Apple logo or another startup screen appears.
- Open Disk Utility and choose View, then Show All Devices to see whether the internal device, its container and the data volume appear. Leave the repair and erase buttons unused while arranging the copy.
Apple documents Apple silicon Recovery and the Intel startup keys. A visible volume may still need unlocking before its files can be opened. If the internal device is missing or the volume will not unlock with the proper credentials, that is the point to seek Mac data recovery help.
Share Disk on Apple silicon
Share Disk offers file access from another Mac through Recovery. It requires the affected Mac to run that environment and provide access to its data. It is a file-sharing connection rather than a raw SSD imaging interface.
- Connect the two Macs with a suitable USB, USB-C or Thunderbolt cable.
- In Recovery on the affected Mac, choose Utilities, then Share Disk. Pick the volume and start sharing.
- On the working Mac, choose Network in Finder and open the affected Mac. Click Connect As, choose Guest and connect to its shared volume.
- Transfer the files to the working Mac or separate storage. Eject the shared volume when finished and stop sharing on the affected Mac.
Those controls are described under Share Disk in Apple's Recovery guide. The cable must carry data; a Thunderbolt 4 cable is not a universal requirement.
Target Disk Mode on Intel
An Intel Mac uses Target Disk Mode. Connect the computers and start the affected Mac while holding T. Apple requires Thunderbolt if either computer uses macOS 11 or later. Unlock the disk if requested, transfer the accessible files and eject it before disconnecting.
First Aid, reinstall and erase do different jobs
If a Time Machine backup disk won't mount, leave it unformatted and use Apple's Time Machine checks. If it opens, use Migration Assistant on a working Mac to bring files back from that backup.
With a verified backup or complete copy secured, you can work on restoring startup. First Aid checks and repairs the disk's formatting and directory structure. A clean result means those checks passed; startup software, firmware or hardware can still need attention.
For the startup disk, run it from Recovery. Apple's First Aid sequence works upward through the sidebar:
- In Disk Utility, choose View, then Show All Devices.
- Select the last volume under the internal device and run First Aid.
- Repeat for the other volumes, then their container, and finally the physical device.
- When repair finishes, quit Disk Utility and restart to see whether startup completes.
If First Aid cannot repair the volume and you still lack the required files, keep the disk as it is for recovery work. The APFS corruption guide covers that failure. Erasing it to make the installer proceed discards the data you are trying to save.
| Option | What it does | Use in this situation |
|---|---|---|
| First Aid | Repairs supported formatting and directory errors. | After securing the files |
| Reinstall macOS | Reinstalls the operating system while preserving apps and personal data by design. | After backup, for a damaged installation. A failed reinstall does not automatically erase the disk. |
| Firmware revive | Repairs firmware without erasing the Mac. | For applicable T2/Apple silicon firmware failures |
| Erase or firmware restore | Erases the Mac's contents. | Only after the data has been secured or you have chosen to give it up |
A Mac that cannot reach Recovery may need firmware or hardware work before file access is possible.
When the Mac needs recovery work
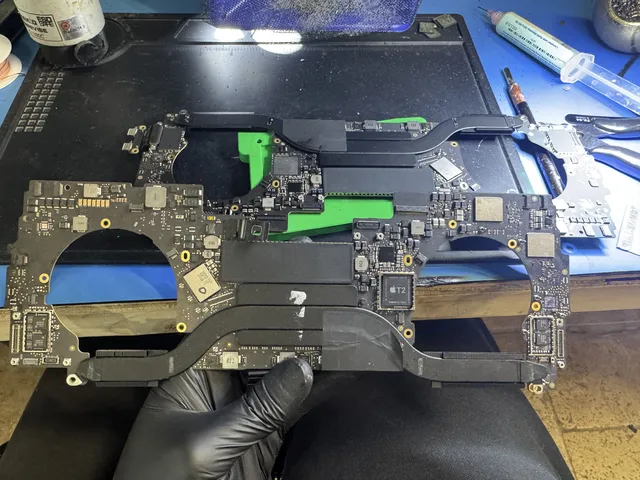
If neither normal startup nor Recovery provides access, software on a second computer cannot simply read encrypted flash chips. The original storage and its security hardware must provide an authorized route to the data. This matters when deciding between replacing the Mac and repairing enough of the original machine to retrieve its contents.
| Failure category | Published cost | Work to resolve |
|---|---|---|
| Recovery opens, Disk Utility reports no errors | $1,500 | Accessible-file extraction and startup investigation |
| Recovery opens, APFS is damaged | $1,500 | Preserve readable data before file-system recovery |
| Recovery opens, FileVault access is blocked | $1,500 | Restore access using the configured credentials or recovery method |
| Recovery will not open | $1,500 | Investigate firmware and original-hardware operation |
The estimate is approved before recovery begins, with the $100 diagnostic credited toward a successful recovery. The cost page has the service terms. A completed erase that destroyed the required keys leaves existing backups as the route to the old files.
Finding a startup extension problem
A kernel extension adds low-level functions to macOS. An incompatible extension or plug-in can cause startup trouble after an upgrade, but a working Safe Mode session does not identify one specific extension. Use the evidence from the failed start before enabling software just to reproduce the crash.
From a working desktop, open Console and look for a panic report dated when the Mac restarted. If you can't find it in the sidebar, use Finder's Go to Folder to open /Library/Logs/DiagnosticReports and look for a report with “panic” in the name. Search the report for “Kernel Extensions in backtrace.” If it lists a third-party bundle identifier, match it to the name and vendor under Software, then Extensions in System Information. If you find a match, check that developer's Sequoia guidance. If it calls for removal, use the developer's uninstaller after backing up. If the report names no extension, leave the installed extensions and system files as they are.
For macOS Sequoia problems, use Apple's version-by-version update notes to check what a release addresses. Before another major update, verify your Time Machine backup and choose a time when an interrupted installation won't put a deadline at risk. They list Sequoia 15.7.9 as a security update.
Get help with data recovery
Bring your device to our Lincroft lab during opening hours, or mail it in.
How to mail your deviceThe $100 diagnostic is non-refundable once diagnostics start, and donor drives or replacement parts you approve are non-refundable once ordered, even if recovery fails.
Published by MDrepairs
MDrepairs is a data recovery and electronics repair lab in Lincroft, New Jersey. Our founder and lead technician Joseph Montanti films real cases for our YouTube channel, showing tools, repair steps and recovery outcomes.
Keep reading
- Soldered Laptop SSD? Your Recovery Options Explained
- iMac Fusion Drive Failing? Recovery Is Trickier
- Apple Silicon Data Recovery: What M-Series Changed