External Drive Shows as 'Unallocated' or '0 Bytes': Recovery Without Formatting
In this article
If your external drive shows as "Unallocated" or "0 bytes" in Windows Disk Management, the drive's partition table has been corrupted or wiped, but in most cases your files are still there. The drive itself usually still works. Windows just can't find the map that says where your folders live. The fix is to read the raw drive with recovery tools that ignore the missing partition table and reconstruct it from the file fragments still on the platters.
Here's the critical part. Do not click "Initialize" when Windows asks. Do not click "Format." Do not let Windows assign a new file system to this drive. Both of those actions overwrite the very metadata you need to recover your files. If you've already clicked through one of those prompts, stop right there and disconnect the drive. Every minute it stays powered on, your odds of recovery drop.
What "unallocated" actually means
Every hard drive and SSD has two layers of data. The first layer is the actual file contents: the bytes that make up your photos, documents, and videos. The second layer is the partition table, a small structure at the very beginning of the drive that tells the operating system how the drive is divided up and where each section starts.
When Windows opens Disk Management, it reads the partition table to figure out how to display the drive. If the partition table is intact, you see your drive with its volumes and assigned letters (D:, E:, F:). If the partition table is missing or corrupted, Windows sees the raw drive but doesn't know what to do with it. It shows the full size as "Unallocated" because, as far as the operating system can tell, there's nothing structured on the drive.
Here's why this is good news. The partition table is tiny, typically a few kilobytes at the start of a drive. Your actual files live in the rest of the drive, untouched. The data is there, the directories are there, the photos are there. We just need to find them without the partition table's help and rebuild the map.
This is fundamentally different from the drive being broken. A drive that's gone unallocated is usually mechanically and electronically fine. It's just missing the table of contents. Compare that to a drive that's clicking, not spinning, or making any abnormal noise. That's a mechanical issue and a different conversation entirely.
What causes a drive to go unallocated
Several different events can wipe or corrupt the partition table. The fix depends on which one happened to you. Here are the common ones we see in the lab.
Sudden power loss during a write
If the drive was in the middle of writing data, especially metadata, when the power got cut (USB cable yanked, laptop battery died, power outage), the partition table can become inconsistent. Windows reads it on the next connection, decides it's invalid, and shows the drive as unallocated.
This kind of corruption is usually the easiest to fix. The original partition table or its backup is often still in the drive's reserved areas, and recovery software can find it and reconstruct the file system. We've seen this scenario in recovery work. Almost always recoverable.
Virus or ransomware activity
Some malware specifically targets the partition table to make recovery harder. The most common pattern is to overwrite the first few sectors of the drive (where the MBR or GPT lives), making the OS see the drive as blank. Ransomware sometimes does this after encrypting files, so the user can't easily get to the encrypted files to attempt cleanup.
If you suspect malware, disconnect the drive immediately and don't connect it to any other machine. We can pull data off the drive in a forensically isolated environment without risking spreading the infection.
Failed partition resize or OS upgrade
If you ever tried to resize a partition (with EaseUS Partition Master, AOMEI, or Windows Disk Management's built-in tools) and the operation crashed or got interrupted, the result can be a half-finished partition table that the OS treats as invalid. Same goes for botched OS upgrades where the installer fails partway through repartitioning.
These are often recoverable, but the recovery path is more delicate because there may be multiple competing versions of the partition table layout in different sectors. We have to figure out which one was current when the operation failed.
USB controller or enclosure failure
External drives have two layers: the bare hard drive (or SSD) inside, and the USB-to-SATA bridge chip in the enclosure that translates between USB and the drive's native interface. When the bridge chip fails or behaves erratically, you can get strange symptoms, including the drive showing as unallocated when it isn't actually corrupted.
The fix here is simple. Pull the drive out of the enclosure (every external drive is just an internal drive plus an enclosure), and connect it directly via SATA inside a desktop, or via a known-good USB-to-SATA adapter. If the drive comes back with all its data intact, the enclosure was the failure, not the drive itself. Replace the enclosure for $20 and you're back in business.
Bad sectors in the partition table area
Hard drives develop bad sectors over time, parts of the platter where data can no longer be reliably read. If the bad sectors land in the first few megabytes of the drive (where the partition table lives), the result is exactly what you'd expect: the drive can be detected by the BIOS and the USB enumeration, but the partition table reads as garbage, and Windows shows the drive as unallocated.
This is where it gets risky. Bad sectors in the partition area mean the drive is starting to physically deteriorate. The longer it stays powered on, the more sectors can fail. Recovery for these drives needs to happen in a lab where we can image the drive in a controlled way that minimizes additional wear on the failing media.
Drive starting to mechanically die
Sometimes the "unallocated" symptom is the first visible sign of a drive starting to fail mechanically. The drive heads can read most of the platter fine, but trip up consistently on the first few tracks. The drive doesn't show as failed in SMART data yet, and it doesn't make clicking noises, but the partition table reads keep failing.
This is the most dangerous category. Every read attempt risks further damage. If you've already done a few hours of DIY recovery attempts, the drive may be measurably worse than when you started. Some warning signs for failing drives are documented here, and the same principles apply to spinning HDDs.
What NOT to do (this is where most data dies)
Some attempts make recovery a lot harder. A few make it impossible. Here's the list of things to absolutely not do, in order of how badly each one hurts.
- Click "Initialize Disk" when Windows asks. Initialize writes a fresh, empty partition table to the drive. The old one (and its backup copy) gets overwritten. Most file system metadata is destroyed in the process. Recovery is still possible but significantly harder and more expensive after this.
- Click "Format" or assign a new file system. Quick format writes a new file system structure over the drive's first few megabytes. Full format zeroes out every sector. Quick format is recoverable. Full format usually isn't.
- Run diskpart with "clean" or "create partition primary." These commands rewrite the partition table directly. Same destructive effect as Initialize, sometimes worse because they can be followed up with formatting.
- Continue using the drive after the symptom appears. If the drive is starting to mechanically fail, every minute of operation risks more bad sectors developing. Read-only access in a lab environment is safer than DIY scanning that can stress the drive.
- Use TestDisk to "write" recovered partitions back to a failing drive. TestDisk is a legitimate tool, but it's destructive if used wrong. The "Write" action commits changes. If TestDisk got the partition layout wrong (which happens), writing it back can wreck the drive permanently.
The pattern across all five is the same. Every "fix" Windows or the recovery software offers involves writing to the drive. Writes overwrite data. If the data you want to recover is on the drive, writing to the drive risks destroying it. The safe path is always read-only access first, until you're confident about what you've got.
DIY tools: what works, what destroys
There are real recovery tools that work in the right hands. There are also tools that look helpful but are dangerous on a failing drive. Here's our honest take on the popular ones.
| Tool | Verdict | Notes |
|---|---|---|
| TestDisk (CGSecurity) | Useful, dangerous | Free, can rebuild partitions, but writing back is destructive if wrong |
| PhotoRec (CGSecurity) | Read-only, safer | Free, signature-based file carving, files lose names |
| EaseUS Data Recovery Wizard | OK on healthy drives | Subscription, GUI-driven, dangerous on failing drives |
| Recuva | Limited use | Free, works on undeleted files mostly, weak on partition rebuild |
| R-Studio | Powerful, learning curve | Paid, used by some labs, can image drives first which is safer |
| DMDE | Powerful, learning curve | Free for personal use, strong on damaged file systems |
| Disk Drill | OK on healthy drives | Mac and Windows, similar to EaseUS |
| Stellar Data Recovery | OK on healthy drives | Subscription, similar GUI category |
| chkdsk | Dangerous | Built into Windows, writes "repairs" that can destroy file system metadata |
| Linux ddrescue | Read-only, safer | Free, images failing drives sector by sector for offline analysis |
The general rule with DIY: image the drive first, work on the image second. Every reputable lab does this. We never operate directly on a customer's drive unless we have a complete sector-by-sector copy first. Most consumer tools skip the imaging step, scanning the drive directly. That's fine for a healthy drive, but it's risky when the drive is borderline.
If you want to try DIY, the safer path is: pull the drive out of its enclosure if external, connect via SATA or a known-good adapter, use Linux ddrescue or a Windows imaging tool to copy the drive to a same-or-larger blank disk, then run recovery software against the copy. Never against the original.
Logical failure vs mechanical failure
Every unallocated drive case falls into one of two buckets: logical failure or mechanical failure. The difference is huge for what comes next.
Logical failure means the drive's hardware is fine, but the data structures on the platters (partition table, file system, directories) are corrupted or missing. Recovery is a software problem. We connect the drive, image it, analyze the image, and reconstruct what was there. These cases are faster, cheaper, and more predictable.
Mechanical failure means something in the drive's physical hardware is failing. Heads, motor, platters, electronics. The drive may still partially function (which is how you see "unallocated" instead of "no media"), but it's deteriorating. Every operation risks more damage. Head and platter work takes place in a laminar-flow work area.
How do you tell the difference at home? You usually can't. Both can present identically: drive shows up, BIOS detects it, but the partition reads as unallocated. The clues are subtle. Drive making any unusual noise, the drive feeling unusually hot, the drive that worked yesterday and doesn't today after no obvious event, these are all hints toward mechanical issues. We have a separate guide on clicking drives for the most obvious mechanical pattern.
The safe play is to assume mechanical until proven otherwise. Don't run scans for hours hoping it'll come back. Disconnect the drive after the symptom appears and call a lab.
0 bytes, no media, unallocated: differences
Windows shows different states for different problems. Knowing which state you're in tells us a lot about what failed.
| What Windows shows | What it means | Recovery outlook |
|---|---|---|
| Drive shows in Disk Management as "Unallocated" with full capacity | Drive is healthy enough to report capacity. Partition table is missing or corrupted. | Usually recoverable, often logical-only |
| Drive shows with 0 bytes total capacity | Drive responded to enumeration but firmware can't report its actual size. Often firmware corruption. | Recoverable with lab tools, drive often physically OK |
| Drive shows "No Media" or "Not Initialized" | Drive enumerates but the disk inside hasn't spun up or isn't responding. | May need head or platter work in a laminar-flow work area |
| Drive doesn't show in Disk Management at all | BIOS or USB didn't enumerate it. Likely controller, enclosure, or cable failure. | Try a different enclosure or cable first. Then lab. |
| "Disk Unknown, Not Initialized" with prompt | Drive size is detected but the partition table is missing entirely. | Often recoverable. See our separate guide. |
| Drive is detected but volume shows as "RAW" file system | Partition table is intact, but the file system inside is corrupted. | Recoverable with file system rebuild tools or lab |
If your drive falls into the second row (showing 0 bytes), that's a firmware-level failure and consumer tools won't help, even if they show a "scan" option. The drive needs lab tools that can talk to it at the firmware level. Same general category as clicking drives in terms of where the work happens.
Our recovery process
Mail-in devices come to our lab in Lincroft, New Jersey. Here's the actual process so you know what to expect.
Step 1: Free phone consult
Call (732) 933-7717 or fill out a quote form. Describe what Windows is showing, what happened before the drive went unallocated, and what's on it that matters. We give you a price range before you ship.
Step 2: Ship the drive
If it's an external drive, pack the whole enclosure (don't pull the drive out yourself, sometimes the enclosure has clues we want to see). If it's a bare internal drive, anti-static bag in a padded box. You generate a free prepaid UPS label on the mail-in form (contiguous US) if you want one. More on shipping drives for recovery.
Step 3: Diagnosis
During diagnosis, we connect the drive in a forensically isolated environment, attempt to read the boot sectors, image the start of the drive, and assess whether the failure is logical, mechanical, or both. You get a firm quote with the diagnosis.
Step 4: Imaging
If the drive is at all questionable, we image it sector-by-sector to a healthy target drive before doing any analysis. The imaging is read-only and protects against further wear. Bad sectors are noted and handled. The original drive doesn't get any more reads than absolutely necessary.
Step 5: Reconstruction
Working from the image, we rebuild the partition table, walk the file system, and extract files into a clean folder structure. For drives with severe corruption, this can involve manual analysis of file system metadata and signature-based carving of unindexed regions. Our standard recovery estimate is 4–6 weeks; timing may vary by case.
Step 6: Data return
Recovered data comes back on an external drive you can plug in to any computer. We preserve folder structure and original filenames whenever the file system is recoverable. Cloud transfer is also available for sensitive data that you don't want to ship physically. The original drive comes back to you too, condition as-received.
Honest pricing
Unallocated drive recoveries land all over the price range depending on what's actually broken. Here's the realistic range with no fake "starting at" numbers.
| Failure type | Typical range | Why |
|---|---|---|
| Logical only (partition table wiped, drive healthy) | $1,000 to $1,500 | Imaging plus partition rebuild, no mechanical work |
| Drive healthy, file system corrupted | $1,000 to $1,500 | Logical reconstruction with deeper analysis |
| Bad sectors in partition area, otherwise OK | $1,000 to $1,500 | Careful imaging around bad sectors, partition rebuild |
| USB bridge failure (drive itself healthy) | $1,000 to $1,500 | Pull drive from enclosure, image directly |
| Drive starting to mechanically fail | $1,000 to $1,500 | Imaging with extensive bad sector handling |
| Full mechanical failure (heads, motor) | $1,500 to $3,000+ | Laminar-flow work area, donor drive parts |
| Drive previously formatted or initialized | Higher end of the range | More aggressive carving needed, longer reconstruction |
Two important pricing notes. First, the $100 diagnostic is credited toward successful recovery and is non-refundable once diagnostics start. Donor drives or replacement parts you approve are non-refundable once ordered, even if recovery fails. You approve the recovery estimate before recovery work starts. Second, if you've already tried Initialize, Format, diskpart, or chkdsk before sending it to us, expect to be at the higher end of the range, because we're working through your attempts as well as the original failure. Full pricing details here.
Why customers come to us after DIY fails
Prior recovery attempts are relevant when assessing an unallocated drive. Common patterns we see:
- Ran TestDisk, wrote back a wrong partition layout, drive is now worse. TestDisk is a good tool when you know what you're doing. It's also a way to destroy a drive when you don't.
- Clicked "Initialize" because Windows said to, now there's a fresh empty partition. Still recoverable, but with more work and reduced odds for some file types.
- Let EaseUS scan the drive for 18 hours, drive started clicking halfway through. The scan stressed a borderline drive into actual mechanical failure.
- Ran chkdsk /f on a corrupted volume. chkdsk's "repairs" write to the disk and can shred file system metadata that recovery tools would otherwise use.
- Took the external out of its enclosure, plugged the bare drive into a desktop, it works fine. This one is happy news. The drive is OK, just buy a new enclosure.
The fifth case is worth special mention. An enclosure fault is one possible cause of an external drive becoming inaccessible. If you have a desktop with a spare SATA port (or a $20 USB-to-SATA adapter), this is worth trying before sending the drive in. Pull the drive out of the enclosure carefully (they're usually just clipped or screwed into a plastic case), connect it directly, and see if it shows up normally. If yes, problem solved.
What this work looks like in the lab
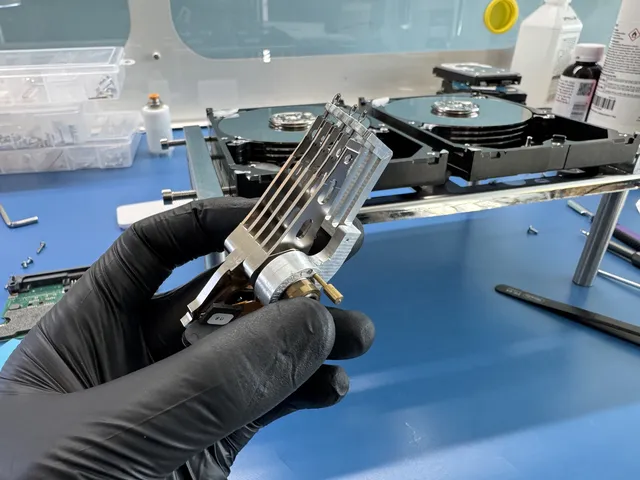
The video below covers HDD recovery with a single failing head. Different visible symptom from "unallocated," but the same underlying truth: the drive's mechanical state determines what's possible. When we image a drive with developing bad sectors, this is the kind of careful read-by-read work that happens.
When recovery actually isn't possible
Most unallocated drives recover. A few don't. Here are the cases where no lab anywhere can help, so you can save your money.
- Drive was full-formatted (not quick-formatted) after going unallocated. Full format writes zeros across every sector. Once that's done, your data is gone the same way it would be on a brand-new drive. Quick format is recoverable. Full format is not.
- Drive was reused for new data after going unallocated. If Windows formatted the drive and you copied new files to it, the new files have overwritten parts of the old. The unoverwritten parts may still be recoverable, but anything under the new files is gone.
- Drive has been encrypted with BitLocker or FileVault and you've lost the key. Encryption keys gone means the data is encrypted gibberish even after a perfect recovery of the raw blocks. The drive can be read, but what comes out is unreadable without the key.
- Drive has multiple mechanical failures and several head crashes. A drive that's had heads crash into platters and tear up the surfaces in multiple places may have unreadable regions in the partition area that nothing can fix.
- Drive was deliberately wiped with DBAN, secure erase, or military-style wipe tools. These overwrite the entire drive with patterns of zeros and random data. Recovery is impossible after a successful wipe.
If you're not sure which bucket you're in, give us a call. We'll discuss whether it's worth pursuing.
FAQ
Why does Windows want me to initialize or format my drive?
Windows defaults to assuming any drive without a readable partition table is brand new and needs to be set up. That's a reasonable assumption for new drives. It's a terrible suggestion for a drive that previously had your data on it. Initialize and Format both overwrite the very metadata you need to recover. Always close the prompt and disconnect the drive instead.
Will my data still be on the drive after it shows as unallocated?
In most cases, yes. The "unallocated" state means the partition table is missing or corrupted, not that the data has been erased. The actual file contents still live on the platters or NAND chips, untouched. We just need recovery tools that can find them without the partition table's help. The key is to not write to the drive between when the symptom appears and when recovery happens.
Can I use TestDisk or EaseUS myself instead of paying a lab?
Sometimes, if the drive is healthy and you're comfortable with the risk. TestDisk is free and powerful, but writing the wrong partition layout back can wreck the drive. EaseUS and Disk Drill are easier to use but stress the drive during scanning. The safer path is to image the drive first (with ddrescue or a similar tool) and work on the image. If you're not sure how to image safely, lab recovery is much less risky.
Is "Unallocated" the same as "Not Initialized" or "Disk Unknown"?
Similar but not identical. "Unallocated" usually shows the drive's actual size and reports the space as unused. "Not Initialized" or "Disk Unknown" usually shows the drive but doesn't display capacity. The underlying causes overlap (corrupted or missing partition tables) but the firmware-level symptoms can be different. We have a separate guide for the Not Initialized error.
Why does my drive show as 0 bytes?
0 bytes means the drive is responding to Windows but the firmware can't (or won't) report its actual size. This is usually firmware corruption on the drive itself, not a partition table issue. Consumer recovery software can't help here because the OS doesn't see anything to scan. Lab tools talk to the drive at the firmware level and can usually read the user data.
My external drive doesn't show up in Disk Management at all. What now?
That's a different symptom from unallocated. The drive isn't enumerating at the USB level. First, try a different USB cable and a different port. Then try a different machine. Then try pulling the drive out of its enclosure (every external is just an internal drive plus an enclosure) and connecting it via SATA inside a desktop, or via a USB-to-SATA adapter. If it shows up at any of those steps, the original enclosure was the failure. Full guide on external drives that don't appear here.
How much does unallocated drive recovery cost?
Typical recoveries run $1,000 to $3,000+ depending on the failure. Logical-only cases (partition table corrupt, drive healthy) are usually $1,000 to $1,500. Cases with bad sectors or developing mechanical issues run higher. Head and platter work uses a laminar-flow work area. We quote a firm price after diagnosis.
How long does the recovery take?
Our standard recovery estimate is 4–6 weeks; timing may vary by case. Queue, parts, drive condition, imaging and delivery affect the schedule. Drives with bad sectors need careful imaging around the damaged areas.
Should I try a different USB cable or port first?
Yes, absolutely, before sending the drive anywhere. Try at least two different USB cables. Try ports on the back of the desktop rather than the front (back ports are wired directly to the motherboard, front ports go through an internal hub). Try a different computer entirely. If you have a desktop, pull the drive out of its enclosure and connect it directly via SATA. Many "unallocated" drives are actually working drives in failed enclosures.
What if I already clicked Initialize? Is it too late?
Not necessarily. Initialize writes a fresh partition table over the old one. Some metadata gets overwritten. But most of your file data is still intact further into the drive, and recovery is still possible with more aggressive carving. The price goes up by a few hundred dollars and the folder structure may not be perfectly preserved, but the photos and documents themselves usually come back. Just don't format the drive on top of that. Send it in as-is.
Can I ship the drive in its external case, or should I pull it out first?
Ship the whole external. We want to see the enclosure too, because sometimes the enclosure is the failure point and we can assess that without doing any drive work. If you've already opened the enclosure, that's fine, just pack the drive in an anti-static bag with extra padding. Shipping tips here.
How MDrepairs can help
Real cases like this come through our New Jersey lab every week. If you are dealing with one now, start here.
- Undetected Hard Drive Recovery Recovery when a drive is not detected or shows no capacity. Learn more
- External Hard Drive Recovery Recover data from external drives that wont mount or connect. Learn more
- Hard Drive Data Recovery Mechanical, firmware and logical HDD recovery on every brand. Learn more
- Data Recovery Services Every device and failure type, recovered in our New Jersey lab. Learn more