Photo Recovery from SD Card: Deleted and Formatted Pictures
Our founder and lead technician, Joseph Montanti, handles cases personally.
To recover photos from an SD card, wait for the camera’s write light to go out and switch it off before lifting the card out by its edges, clear of the metal contacts. Never try to read, heat or repair a wet, cracked or bent card at home. If an intact card opens in a reader, copy the visible photos to your computer first. For missing photos, image a steadily readable card to another drive and search the image with PhotoRec or another recovery program.
On this page
Start with the card you have
A card that reads normally after an accidental deletion is a good candidate for software recovery. Use a card reader that supports its type: an older SDHC reader may not support an SDXC card. The SD Association explains reader compatibility. A microSD card follows the same recovery process, using a suitable reader or full-size adapter.
Do not take new photos on the card. A copy of the visible DCIM folder leaves out the space where deleted pictures may remain.
Keep the card out of service. Cancel any format or Windows “Scan and fix” prompt, and keep CHKDSK, fsck and First Aid off the source card. Stop reading if the card gets hot, drops out or returns an error.
Windows may call a card RAW when it cannot recognize its filesystem. If the card reports its expected capacity and reads steadily, an image can still contain recoverable photos. A card that reports zero bytes or cannot be detected through a compatible, working reader needs a different approach: software must be able to read its storage before it can search for pictures. If photos start disappearing after only part of the labeled capacity is used, stop writing. A counterfeit card may report more storage than it contains, so later photos can overwrite earlier ones or never be saved.
What deletion and formatting leave behind
The filesystem keeps track of filenames and where their contents are stored. Deleting a photo can release its space for reuse while leaving the image bytes there. Recovery software can use surviving directory information or search for recognizable file structures. For example, a JPEG commonly begins with the bytes FF D8 FF. PhotoRec's documentation explains how its signature search works even when directory information is damaged.
A signature is only the beginning of a file. If part of a photo has been overwritten, finding its header will not bring back the missing pixels. Files split across separate areas of the card can also be harder to reconstruct than files stored in one continuous run. That matters for large RAW photographs and video clips.
SD cards are not exempt from erasure. The SD specification includes erase and discard operations. Whether a camera, phone or card reader sends those commands affects what remains available to recovery software. There is no fixed period during which deleted photos will stay recoverable.
Quick format and a camera's low-level format
The SD Association's formatter distinguishes Quick format, which rebuilds filesystem information without overwriting the file contents, from Overwrite format, which overwrites the user-data area. That distinction explains why recovery after one format can differ so much from recovery after another.
Camera formatting also varies. Canon's EOS M50 Mark II manual says its low-level format processes all recordable sectors and is intended for completely erasing data. A format performed in a camera should therefore be judged by that camera's operation, rather than assumed to be harmless to deleted photos.
If you already formatted the card, preserve its current contents and scan the image. Shooting more pictures afterward may have replaced portions of the earlier photographs. A recovery scan can extract what remains; another format adds nothing useful to that search.
Image the card and recover the photos
A disk image is a sector-by-sector copy saved as a file. It lets you try different recovery settings without reading the original card again. You need space for the card's full capacity, plus room for the recovered pictures.
- Connect the intact card through a compatible reader. Install recovery software on your computer, keeping the SD card as the source only.
- Create a whole-card image on your computer or another drive. Disk Drill provides a Byte-to-byte Backup feature; follow its Windows and Mac imaging instructions and choose the physical card as the source.
- Check that imaging completed without unreadable regions or interruptions. If it failed, keep the partial image and original card for recovery work instead of repeatedly scanning the card.
- Once the image is complete, safely eject the card from the computer. Open the image in your recovery program. Search for the photo formats your camera used, and save the results to another drive. Never save recovered files back to the card.
- Open the recovered pictures at full resolution because an embedded thumbnail may survive a damaged photo. Play each important video to the end. Check the important images for missing sections, gray areas or color damage before treating the recovery as complete.
Using PhotoRec on the image
PhotoRec is free and works on Windows, macOS and Linux. It searches file contents and usually gives recovered photos new names, so expect some sorting afterward. Its companion TestDisk can help with surviving filesystem information; neither tool requires you to write a repaired partition table to the original card to extract photos.
- Download the TestDisk/PhotoRec package from CGSecurity and extract it on your computer.
- Open the saved raw image with PhotoRec. CGSecurity documents
photorec image.dd; use your image filename. On Windows, its image instructions also describe opening the file withphotorec_.win.exe - Select the appropriate partition, choose Search, and select Other for a FAT or exFAT card. Use Whole when searching a formatted or damaged filesystem.
- Choose a recovery folder on your computer or another healthy drive. Confirm the destination using the key shown on screen.
PhotoRec saves results in folders such as recup_. Its step-by-step guide explains FileOpts if you want to limit the search to particular formats. Some camera RAW formats are grouped under TIFF, so disabling everything except JPEG would miss those files.
Photo recovery software options
The tools below approach the card differently. A filesystem-based scan can preserve names and folders when enough directory information survives. A signature scan can find photographs after that information is lost, but it may produce duplicates, thumbnails and incomplete files alongside full images.
| Software | License | Computer | Relevant function |
|---|---|---|---|
| PhotoRec | Free | Windows, Mac, Linux | Finds files by their contents, including photos on reformatted cards. |
| TestDisk | Free | Windows, Mac, Linux | Works with partition and filesystem information; useful when names and directories survive. |
| Disk Drill | Free scan; paid recovery with a limited free Windows allowance | Windows, Mac | Image creation, file preview and recovery from an image. |
| R-Studio | Paid; demo available | Windows, Mac, Linux | Filesystem recovery and scanning of disk images. |
| Recuva | Free and paid editions | Windows | Deleted-file recovery, including memory cards. |
| ReclaiMe | Paid | Windows | FAT/exFAT recovery with file previews. |
Start with a tool that can open your saved image and recognize your camera's file type. A paid program's preview can help you inspect results before purchasing, but buying a second program will not restore image data that was overwritten. If one scan disappoints, review the file-type settings and the completeness of the image before deciding the card holds nothing useful.
When the card needs lab work
An SD card contains flash memory and a controller that manages reads, writes and the mapping between logical sectors and physical memory. The computer asks for sectors; it does not directly address the individual flash pages. If the controller cannot supply those sectors, a desktop recovery program has nothing to scan.
If the card got hot, dropped out or returned read errors, leave it out of the reader. If non-detection is the only symptom on a dry, intact card, try a known-working compatible reader once, unless you already used one. Physical damage or a card that remains unreadable through a working reader calls for SD card recovery.
| Card condition | Useful recovery route |
|---|---|
| Deleted photos; normal capacity and steady reads | Image the card, then recover files from the image. |
| RAW or format prompt; sectors still readable | Preserve the sectors and search the image for filesystem information and photo signatures. |
| Wrong capacity or persistent non-detection | Stop home tests and have the card examined. |
| Cracked, bent or water-damaged card | Examine the physical damage and access to the memory in a lab. |
| Formatted and used for new pictures | Search what remains; overwritten portions of old files are a limit for both software and lab work. |
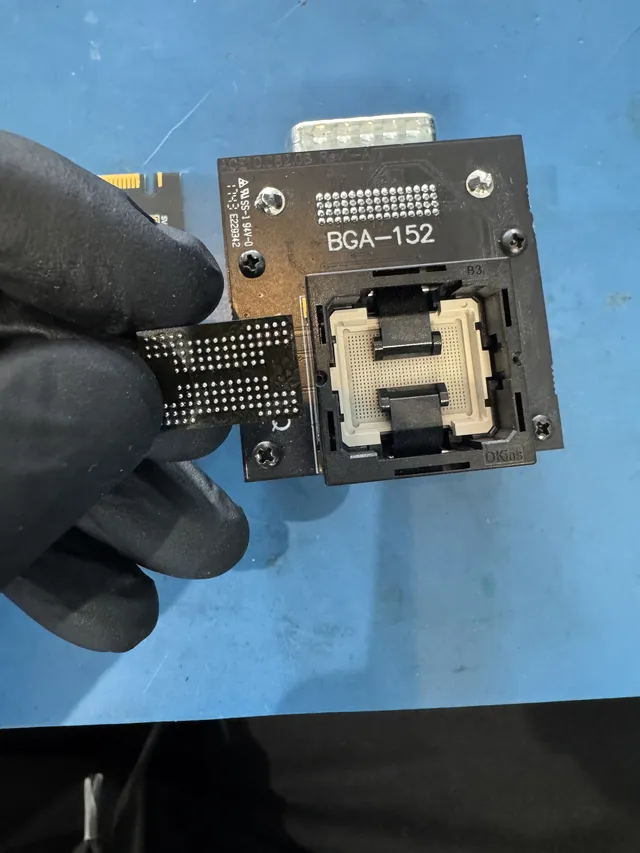
Direct access to the flash memory is more involved than copying its contents. In the lab's undetected SD-card recovery, Joe exposed connection points, wired the card to an adapter and read it with PC-3000 Flash. He then corrected read errors, unscrambled the data and rebuilt its page arrangement, recovering more than 200 pictures. That reconstruction turns the memory's internal layout into sectors from which files can be extracted.
A separate underwater SD-card case also required wiring to the memory after the card failed to read through an adapter. PC-3000 Flash was used to read and reconstruct it, and more than 140 pictures were recovered. A fixed drying time would not address damaged contacts or electronics on a wet card.
SD card recovery prices by fault
| Failure type | Price | Work involved |
|---|---|---|
| Logical: deleted or formatted files | $299 - $2,000 | Recovery from readable storage. |
| Firmware corruption | $299 - $2,000 | Restoring access to the stored data and extracting files. |
| Supported flash reconstruction | $1,750 - $2,000 | Reading flash memory and reconstructing its layout. |
The diagnostic costs $100 and is credited toward a successful recovery, with your approval of the estimate required before recovery work begins. The standard recovery estimate is 4–6 weeks and can vary with the case.
RAW photos, phone cards and the lock switch
A camera RAW file and a card reported as RAW in Windows are different things. CR2, CR3, NEF, ARW and RAF are image formats; Windows' RAW label concerns its ability to recognize the volume. Use a recovery program with support for your specific camera format. Finding JPEG previews inside a RAW file can make a scan look successful even while the full-resolution original is incomplete.
An Android card formatted as internal or adoptable storage has another requirement: the original phone's encryption keys. Android's documentation describes how adopted storage is encrypted for its adopting device. Recovering that phone's operation may be necessary to read the card. A portable-storage card can be approached separately, according to its filesystem and any encryption configured on it.
The sliding lock on a full-size SD card or microSD adapter controls write protection as interpreted by the reader. It does not hide photographs. The SanDisk lock-switch instructions address a card that refuses writes; moving the switch is not a recovery method for pictures that disappeared.
Get help with data recovery
Bring your device to our Lincroft lab during opening hours, or mail it in.
How to mail your deviceThe $100 diagnostic is non-refundable once diagnostics start, and donor drives or replacement parts you approve are non-refundable once ordered, even if recovery fails.
More lab videos
Published by MDrepairs
MDrepairs is a data recovery and electronics repair lab in Lincroft, New Jersey. Our founder and lead technician Joseph Montanti films real cases for our YouTube channel, showing tools, repair steps and recovery outcomes.
Keep reading
- SD Card Write Protected? Fixes Beyond the Switch
- SD Card 'Blank or Unsupported'? Android Fix Guide
- USB Files Turned Into Shortcuts? How to Unhide Them