iPhone Unavailable: What to Check Before You Erase
In this article
Last updated: March 2026
"iPhone Unavailable" means the phone has blocked passcode entry after wrong attempts. The message alone doesn't mean your files have been erased. If a timer is showing and you remember the passcode, wait and enter it carefully. If you recently changed the passcode, Apple's previous-passcode option may let you back in without erasing. Otherwise, when you can't unlock the phone, Apple's supported reset procedure erases its contents. Check for backups before you choose it. Erasing gets the phone ready to use again; it doesn't recover the files inside.
We know that's brutal to hear. But we'd rather be honest than charge you for something that's impossible, which is exactly what some shady companies out there will do. Below, start with the passcode checks and backup search. Follow the erase steps only after you've decided you can accept losing any files that weren't saved elsewhere.
If you can't find a backup of the files you need, reach out to us before you erase your iPhone.
What Does "iPhone Unavailable" Actually Mean?
"iPhone Unavailable" is Apple's way of saying too many wrong passcodes were entered. It's a security feature built to stop someone from guessing your passcode.
Depending on the iOS version and screen, you may see "iPhone Unavailable," "Security Lockout," or "iPhone is Disabled." Read the timer and the options on your own screen. Those details matter more than the wording alone.
How Does Your iPhone Get Locked Out?
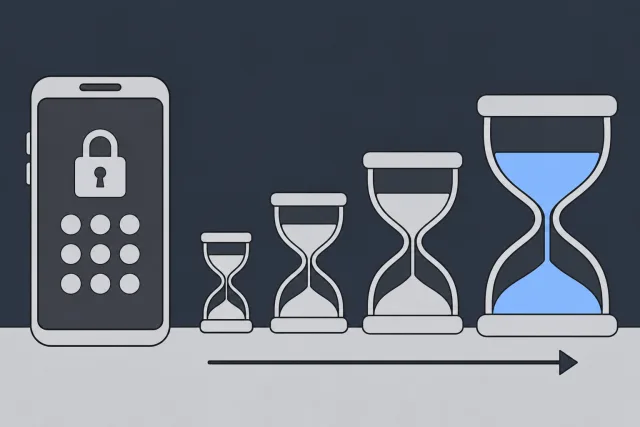
Wrong passcodes lead to longer waits. Apple's current Platform Security guide lists the delays below for the iPhone lock screen. Follow the timer your phone displays; don't use this table as a number of guesses you can safely spend.
 Illustration
| Wrong Attempts | What Happens |
|---|---|
| 3 | No delay listed |
| 4 | 1 minute |
| 5 | 5 minutes |
| 6 | 15 minutes |
| 7 | 1 hour |
| 8 | 3 hours |
| 9 | 8 hours |
| 10 or more | Device locks; Apple lists connection to a Mac or PC |
Possible causes include:
- Kids messing with the phone. Little kids tap random numbers over and over until the phone locks.
- Pocket dials. The phone bouncing around in your pocket or purse can register enough touches to trigger failed passcode entries.
- Forgotten passcodes. You changed it recently and now you can't remember the new one.
- Used phones. You bought a secondhand phone and the previous owner didn't wipe it.
- Break-in attempts. Someone actually tried to get into your phone, which is exactly what this feature is meant to stop.
Why a Lockout Is Different From an Erase
The files on a locked phone are protected by encryption. An unavailable screen, an automatic erase, and a reset you choose are different events. Knowing which one happened keeps you from erasing files that may still be there.
How iPhone Encryption Works (The Simple Version)
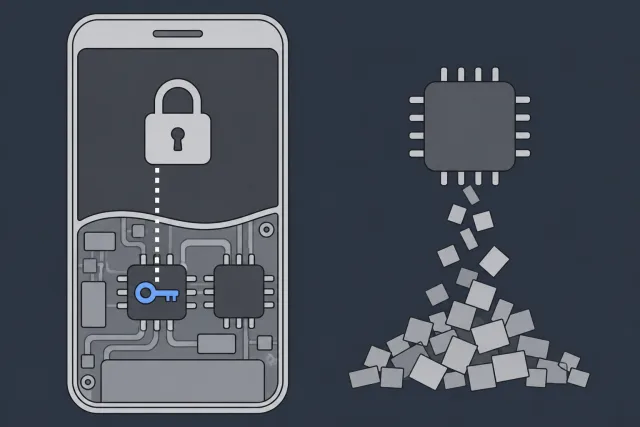
The passcode helps protect the keys that make your private files readable. Apple ties that protection to the device's hardware. Copying the storage chip doesn't turn encrypted photos or messages into files you can open.
 Illustration
That's why getting a phone working and getting its data back are different jobs. A reset can remove a forgotten screen lock by erasing the phone, but it doesn't recover what was stored there.
If you can still enter the correct passcode after a timer, use that chance to unlock and back up. A countdown isn't a message that the files have already been erased.
What to Check Before You Erase
The word "Unavailable" doesn't tell you that encryption keys were destroyed. Apple documents lockout delays separately from the optional Erase Data setting. There isn't a general iOS 13 rule that makes every unavailable phone an erased phone.
If you changed your passcode recently, check Passcode Reset first. On iOS 17 or later, the previous passcode can work within 72 hours of a change, unless you expired it early. Use Apple's previous-passcode instructions when that matches your situation:
- On the unavailable screen, tap Forgot Passcode? if it's offered. Apple lists an active network connection, your Apple Account, and Find My as requirements for this option.
- Choose Enter Previous Passcode or the passcode-reset option shown on your version. Don't choose Start iPhone Reset or Erase iPhone to try to keep your data.
- Enter the previous passcode you know, then follow the prompts to set a new one. Don't test guesses for the old passcode.
- Once you're back in, check your files and make a backup before doing anything else.
If there's still a timer and you think you'll remember the passcode, waiting costs you the delay shown on the screen. Guessing can bring longer delays, lockout, or an automatic erase if that setting or a management policy applies. Don't spend attempts on a list of possible codes.
Older iPhones and checkm8: What to Check First
The checkm8 project describes a bootrom exploit. Its name alone doesn't tell you whether a phone's private files can be decrypted. Check the actual device, its security state, and the copies you already have before choosing a procedure.
What Is checkm8?
checkm8 is a research tool for low-level access on supported hardware. Its documentation lists tasks such as dumping the boot ROM. That is different from exporting your photos or opening encrypted user files.
Apple ties passcode protection to the device's hardware. An old model or an exploit name isn't a substitute for the credentials and keys needed to read private files. Don't run unfamiliar software on your only copy while you're still checking the supported options below.
Which Check Applies to Your iPhone?
| Situation | Check | Why | Next Step |
|---|---|---|---|
| Timer showing | Do you know the passcode? | A timed lockout isn't an erase | Wait, then use the known code |
| Recently changed passcode | Previous-passcode eligibility | A supported option may preserve data | Check Forgot Passcode? |
| Your phone still opens with Face ID or Touch ID (before a lockout) | Can you open your files? | Face ID or Touch ID can't open your iPhone when it requires the passcode after too many wrong attempts | Back up now |
| Computer backup exists | Backup date and password | Only saved contents can be restored | Keep the backup safe |
| iCloud backup may exist | Check from another signed-in device | Account access alone isn't proof of a backup | Find the backup before erasing |
| Photos or files synced | Open the saved files elsewhere | Sync and device backups are separate | Check what is actually saved |
| No known saved copies | Are the files still needed? | Resetting loses local data | Leave the phone unerased |
| Phone already erased | Copies made before erasure | A reset doesn't recover local files | Restore an existing backup |
| Forgotten Apple Account password | Account recovery | Activation and backups can need it | Recover the account first |
| Only the model or iOS version is known | Lockout state and saved copies | Age alone isn't a recovery result | Work through these checks |
How Data Recovery Works on Older iPhones
Here's how we actually recover data from a disabled iPhone running iOS 12 or below in our lab:
- We put the phone into DFU mode (Device Firmware Update mode) over USB.
- We run the checkm8 exploit to get low-level access to the phone's processor.
- We extract the entire file system, pulling a full copy of everything on the phone's storage.
- We brute-force the passcode, but here's the key part: we use the iPhone's own CPU and Secure Enclave to handle the decryption. This is the only way it works because the decryption keys are tied to that specific phone's hardware.
- Once the passcode is cracked, the file system gets decrypted and we can recover your photos, messages, contacts, and everything else.
Scam Warning: Check Whether an Unlock Erases Your Data
Before using "unlock" software, check whether it resets the phone or recovers files that are still on it. A process that restores or factory resets the iPhone erases its contents. Copying an existing backup is a different operation.
Use these checks before starting:
- Look for a non-erasing option first. Wait for a timer if you know the passcode. If you changed it recently, check Apple's previous-passcode option.
- Read the result the tool promises. If it says it will erase, reset, or restore the device, don't expect the files stored only on the phone to survive.
- A product name isn't a result for your phone. References to Cellebrite or GrayKey don't tell you what will happen to your files. Ask for the exact outcome and whether anything will be erased.
- Check where recovered files would come from. Restoring an existing backup can return its contents. It doesn't retrieve files that were never backed up from an erased phone.
Watch out for companies that:
- Take your phone and your money, sit on it for weeks, then tell you recovery "wasn't possible" and keep your fee.
- Describe an erase as recovery of the files still stored on your locked phone.
- Demand hundreds or thousands of dollars upfront before even looking at your device.
How to Fix the "iPhone Unavailable" Screen
Start with the timer and previous-passcode checks above. If neither lets you in, resetting the phone erases it. Apple's official guide covers the supported computer reset. Don't start until you've checked your saved copies and accepted that any files stored only on this iPhone will be lost.
Choose an erase method only when you're ready to lose the phone's local data. If you have no saved copy of files you still need, leave the phone unerased.
Option 1: Erase from the Lock Screen (iOS 15.2+)
This requires Find My to have been enabled before the lockout, an active Wi-Fi or cellular connection, and your Apple Account password. Follow Apple's on-device reset procedure for your version:
- If you use an eSIM on iOS 16 or earlier, contact your carrier about reactivation before erasing. On iOS 17 or later, tap Forgot Passcode? on the unavailable screen. Check the previous-passcode option before choosing Start iPhone Reset.
- On iOS 15.2 or iOS 16, the erase option is labeled Erase iPhone. Choose it only if you're ready to delete the data.
- Enter your Apple Account password to sign out, then confirm Erase iPhone. This deletes the phone's data and settings.
- On supported newer versions, follow the choice about keeping or deleting your eSIM. When the phone restarts, follow setup and restore an available backup.
Option 2: Use Find My iPhone (iCloud.com)
If Find My was already on, you can erase the phone remotely. This also deletes local data. Activation Lock remains, so keep access to the Apple Account linked to the phone.
- Go to icloud.com/find on a computer or another phone.
- Sign in with the Apple Account linked to the unavailable iPhone.
- Select the correct iPhone from the device list.
- Choose Erase This Device and follow the confirmation steps only after checking your backups.
- If the phone is offline, the erase waits until it connects. After erasure, use your Apple Account to reactivate it and restore an available backup during setup.
Option 3: Recovery Mode and Computer Restore
Apple's forgotten-passcode procedure uses recovery mode. You'll need a Mac or Windows PC, a suitable USB cable, and internet access. Use Finder on a current Mac or Apple Devices on Windows; iTunes is used on older supported setups. The steps below erase the phone when you choose Restore.
How to Use Recovery Mode to Erase and Reset Your iPhone
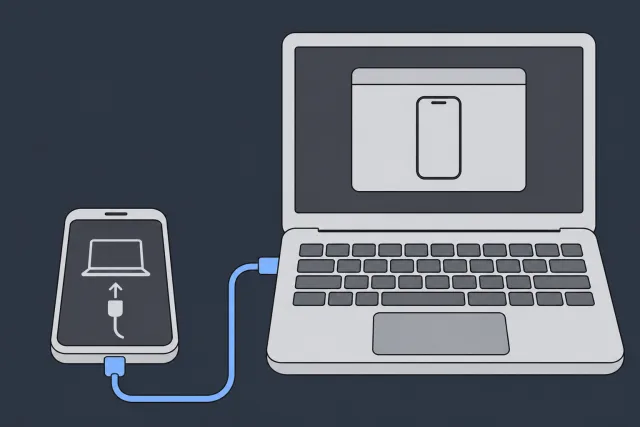
Recovery mode lets the computer restore an iPhone you can't unlock. The phone should show a computer and cable, not stay on a black screen. Only follow these steps after checking the non-erasing options and your backups.
 Illustration
What You'll Need
- A Mac with Finder or a Windows PC with Apple Devices; use iTunes on an older supported setup
- A working USB cable suitable for your iPhone and a computer with internet access
- Your Apple Account and password for activation, plus the password for any encrypted computer backup you plan to restore
Step-by-Step: Recovery Mode for iPhone 8 or Later, Including iPhone SE (2nd and 3rd Generation)
1 Check your backups and account access
Confirm what is already saved and that you can sign in to your Apple Account. If the phone holds your only copy of files you can't lose, stop before choosing Restore.
2 Turn off your iPhone
For an iPhone with Face ID, hold the Side button and Volume Down until the power-off slider appears. On a model with a Home button, hold the Side button for the slider. Drag it to turn the phone off.
3 Connect the cable to the computer
Connect the USB cable to your Mac or PC. Open Finder or Apple Devices, as appropriate for the computer.
4 Connect the iPhone and hold Side
Connect the cable to the powered-off iPhone and immediately press and hold the Side button. Keep holding it.
5 Wait for the recovery-mode screen
Keep holding through the Apple logo. Release when the computer-and-cable image appears. A black screen isn't the target for this procedure.
6 Select the iPhone on the computer
Choose your iPhone in Finder or Apple Devices. If a broken button prevents recovery mode, stop rather than repeating button combinations that can't work.
7 Choose Restore only when ready to erase
Choose Restore when offered Restore or Update, then follow the prompts. This downloads the software and erases the iPhone. It doesn't recover the files that were locked inside.
8 Finish setup and restore your backup
If the software download finishes after the phone has left recovery mode, turn it off and enter recovery mode again. When restoration finishes and the Hello screen appears, follow setup and choose your existing backup.
Step-by-Step: Recovery Mode for iPhone 7 / 7 Plus
- After checking backups, turn the phone off using its Side button and the power-off slider.
- Connect the cable to the computer, then connect it to the iPhone and immediately hold Volume Down.
- Keep holding through the Apple logo until the computer-and-cable image appears.
- Select the iPhone in Finder or Apple Devices.
- Choose Restore only when ready to erase, then set up the phone and restore an available backup.
Step-by-Step: Recovery Mode for iPhone 6S and Earlier, Including iPhone SE (1st Generation)
- After checking backups, turn the phone off using its Side or top button and the power-off slider.
- Connect the cable to the computer, then connect it to the iPhone and immediately hold the Home button.
- Keep holding until the computer-and-cable image appears.
- Select the iPhone in Finder or Apple Devices, or iTunes on an older supported computer.
- Choose Restore only when ready to erase, then set up the phone and restore an available backup.
How to Restore Your Data After a Reset
At the Hello screen, follow setup to restore an existing backup. That returns data saved before the erase. Files that had already synced to an account may also be available when you sign in. Neither option retrieves files that existed only on the erased phone.
Restoring from iCloud Backup
- Follow setup until you reach Transfer Your Apps & Data.
- Tap From iCloud Backup.
- Sign in to the Apple Account that holds the backup.
- Review the backup dates and sizes, then choose the backup you want. Follow any required software-update prompts.
- Keep the iPhone connected to Wi-Fi and power while the restore finishes. Some content continues downloading after setup.
Restoring from a Computer Backup (iTunes/Finder)
- Connect the reset iPhone to the computer that holds your backup.
- Open Finder on a current Mac or Apple Devices on Windows. Use iTunes if that is the supported app on an older setup.
- Select the iPhone and follow any trust prompts.
- Click Restore Backup, review the available dates and sizes, and choose the backup you want.
- Enter the encrypted backup's password if asked, then keep the phone connected until restoration and syncing finish.
What If You Don't Have a Backup?
If you never backed up your phone, some of your stuff might still be recoverable through cloud syncing:
- Photos: If iCloud Photos had finished syncing, those pictures may still be in your account. Check the library from another signed-in device before erasing. Turning sync on wasn't proof every photo uploaded.
- Contacts: Check the account where you saved them, such as iCloud, Google, or Outlook. Only contacts that reached that account can return when you sign in.
- Messages: If Messages in iCloud had synced, check another signed-in Apple device for those conversations. An enabled setting alone doesn't prove every message uploaded.
- App data: Check the backup and account options for each app you use. A phone backup and an app's own saved data may contain different things.
- Notes, Calendars, Reminders: Check another signed-in device for items that had synced to iCloud. Don't assume everything was saved just because you had an Apple Account.
Check the saved files themselves before you erase, not just whether an account exists. If a file never reached a backup or synced account, signing in after a reset won't recreate it. For deleted files, see the guide to recovering deleted iPhone data and the complete deletion recovery guide.
How to Prevent This From Happening Again
Once your phone is back up and running, here's how to make sure you never have to deal with this again. We put together a step-by-step guide on how to back up your iPhone before it dies that covers every method in detail.
1. Set Up Regular Backups
This is the most important thing on this list. Turn on automatic iCloud backups:
- Go to Settings > [Your Name] > iCloud > iCloud Backup
- Toggle on "Back Up This iPhone"
- For automatic backup, connect the phone to power and Wi-Fi and leave its screen locked. Check that the backup completes and that iCloud has enough space.
It's also a good idea to back up to your computer every once in a while as a second copy.
2. Use Face ID or Touch ID
Use Face ID or Touch ID if your model supports it, but keep a secure record of the passcode too. Apple requires the passcode after a restart and other security checks. If biometrics still open the phone and you can't remember the passcode, back up before restarting or changing settings.
3. Use Guided Access for Kids
If you let a child use an app, set up Guided Access in Settings > Accessibility > Guided Access, then start a session in that app. It limits access to the selected app; turning the setting on by itself doesn't start a session. Keep the Guided Access passcode safe too.
4. Think Twice About "Erase Data"
Check what Erase Data does before choosing the setting in Face ID & Passcode or Touch ID & Passcode. When enabled, it removes content and settings after repeated incorrect passcodes. Turning it off doesn't prevent lockout or make a forgotten passcode recoverable. A managed phone may follow its organization's erase policy.
5. Write Down Your Passcode
Keep your passcode somewhere safe: a password manager, a locked note on another device, or even written down and stored at home. It sounds obvious, but it prevents the most common reason people get locked out.
Frequently Asked Questions
Can Apple unlock my disabled iPhone?
Apple's supported options are to use the correct passcode after a timer, use an eligible previous passcode after a recent change, or erase and set up the phone again. Apple Account access can help with activation and backups; it doesn't replace the iPhone's passcode. An erase doesn't recover data that was never saved elsewhere.
How much does it cost to fix an "iPhone Unavailable" phone?
If you just need to erase and reset it, you can do that yourself for free using the recovery mode method above. If you have an older phone running iOS 12 or below and need actual data recovery, contact us for a free quote. Professional data recovery from older iPhones usually starts around $300-$500 depending on the situation.
What's the difference between "iPhone Unavailable" and "iPhone is Disabled"?
Both messages can follow incorrect passcode attempts. The exact wording and options depend on the software and lockout state. Check for a timer and for the previous-passcode option if you recently changed it. Neither label alone tells you that the phone's data was erased.
Can data recovery software unlock my iPhone?
Read what the software will do. If its method restores or resets the iPhone to remove the passcode, it erases local data. Software that reads a saved backup is using that copy, not recovering files from inside an erased phone. Check the timer, previous-passcode option, and your backups before starting.
My iPhone says "Unavailable" with a timer. Is my data safe?
The timer means you must wait before another passcode attempt. It isn't proof your files have been erased, but it isn't a reason to keep guessing. Wait, then enter the passcode only if you know it. More wrong entries can lead to longer delays or erasure if Erase Data or a management policy applies.
Could quantum computers crack iPhone encryption someday?
That isn't a recovery step you can use today. Work through the supported options: a correct passcode after the wait, an eligible previous passcode, and copies already saved outside the phone. Don't erase files you still need because of a promise about future technology.
Can Cellebrite or GrayKey unlock a disabled iOS 13+ iPhone?
The word "Unavailable" doesn't prove that encryption keys were erased, and a name such as Cellebrite or GrayKey doesn't tell you whether your files can be recovered. Ask whether a proposed process preserves the files still on it. Apple's supported reset erases the device; restoring a backup afterward returns only the saved copy.
I have an older iPhone (5S, 6, etc.) that's disabled. Can you help?
Maybe! If your iPhone is running iOS 12 or below, the checkm8 exploit makes data recovery possible. We can extract the file system and brute-force the passcode using the phone's own hardware. Send us a message with your iPhone model and we'll let you know.
Other Data Recovery Services
iPhone data recovery from disabled devices has its limits, but we recover data from other devices and situations:
- iPhone Data Recovery for broken screens, water damage, and phones that won't turn on. See also our guide on recovering data from a broken phone.
- iPad Data Recovery for the same types of issues on iPads
- MacBook Data Recovery for failed SSDs, liquid damage, and dead logic boards
- Laptop Data Recovery for all brands and failure types
- Hard Drive Data Recovery for clicking drives, head crashes, and firmware issues
- SSD Data Recovery for failed SSDs from any manufacturer
- Flash Drive Data Recovery for broken or corrupted USB drives
- SD Card Data Recovery for corrupted or damaged memory cards
We run a professional data recovery lab with a laminar-flow work area for head and platter work. Every case gets an honest evaluation.
How MDrepairs can help
Real cases like this come through our New Jersey lab every week. If you are dealing with one now, start here.