How to Recover Photos from a Corrupted SD Card
Our founder and lead technician, Joseph Montanti, handles cases personally.
To recover photos from a corrupted SD card, preserve a disk image of a readable card, then use recovery software to retrieve the pictures from that image. Corruption can damage the directory that locates the photos while leaving their contents available. A cracked card, a failed controller or unreadable flash memory needs a different approach: hardware recovery before the photo files can be reconstructed.
On this page
What the card error means for your photos
The file system keeps track of filenames, folders and where each file's contents belong. If the camera loses power while updating those records, the directory can be left unfinished. The camera may then show an empty card or ask to format it even though some picture data remains. Formatting creates new file-system information; it can remove information that recovery software needs to join a photo's pieces together.
A hardware failure affects the card's ability to deliver that data. The controller handles communication with the reader and organizes the NAND flash memory where the pictures are stored. A damaged connection, controller problem or unreadable memory can prevent normal access. The card's response through a compatible reader helps separate a directory problem from trouble reading the storage itself.
Keep the original card unchanged. Cancel formatting and repair prompts, and do not take more photos on it. Keep a wet, bent, cracked, unusually hot or repeatedly disconnecting card out of readers and cameras.
| Symptom | What it means | Next step |
|---|---|---|
| Windows asks to format the card or reports RAW | Windows cannot read the file system; photo contents may still be accessible | Cancel the prompt and preserve an image if the card reads steadily |
| The card opens but photos are missing | Directory damage or deletion can hide files from the normal folder view | Save accessible photos, then recover missing ones from an image |
| JPEG files open only partly or show broken areas | The viewer may be unable to decode the file, or part of the photo may be missing or out of order | Save a copy and open it in another compatible viewer. Recover from the card image or try a repair on a separate copy. |
| No card appears through a compatible reader, or the reported capacity is zero or the wrong size | The normal storage interface is unavailable | Stop before imaging. Seek hardware recovery if the reader works with another card. |
| Transfers hang, return read errors or disconnect | The card or connection is failing to deliver data consistently | Have the card examined before further scans |
Reader compatibility matters. The SD Association explains that older SD or SDHC equipment may not support newer SDXC cards. If the card has a full-size write-protect tab, slide it to Lock before inserting it so a compatible reader leaves it read-only. For an undamaged card, a known-good reader that supports its type is a useful check. A drive letter is unnecessary for recovery software that can access the storage device directly.
If the card opens normally, save the pictures from DCIM to your computer, along with any files you need from PRIVATE, MISC or other camera folders. A transfer that starts failing is the point to leave the remaining reads to a recovery specialist.
Preserve the card before searching for pictures
A disk image stores the card's readable sectors in a file on another drive. That includes the file-system records and space that no longer belongs to a visible file. Copying the DCIM folder preserves the pictures that open normally; imaging also preserves the areas a recovery tool needs to search for missing photos.
Sectors the reader cannot read will be missing from the image. Once a usable image exists, several recovery attempts can work from the same saved data without putting the card back through another full scan.
For a stable card with a recognized partition, TestDisk's Image Creation command saves that partition to a raw file named image.dd. This is a partition image; it covers the selected partition rather than every area of the physical card.
- Prepare a destination on a different drive with more free space than the card partition's size, plus room for recovered pictures. Avoid a FAT32 destination for a large image because of its file-size limit.
- Open TestDisk and identify the SD card by its device entry and capacity. Select its partition-table type, using the detected choice when correct.
- In Advanced, select the card's photo partition and choose Image Creation.
- Choose the destination folder on the other drive and let the image complete. Stop if imaging cannot lock the card, stalls or accumulates read errors. Check the error report before relying on the image.
- Eject the card safely and set it aside. Retire it if transfers were failing. Use a separate folder for the pictures extracted from it.
If the partition cannot be identified, a whole-device image avoids relying on its directory or partition layout. GNU ddrescue supports copying a device to an image and uses a mapfile to track which areas were read. It requires correctly identifying the source and destination; reversing them can overwrite the wrong storage. The original card should be unmounted during that copy.
On Windows, R-Photo is free for noncommercial photo and video recovery and includes imaging. Its documented workflow is to right-click the device, choose Create Image and save it elsewhere, then use Open image to recover within R-Photo. Use an image format supported by your chosen recovery program; changing a file's extension does not convert it.
Retrieve photos from the saved image
Where directory records survive, a recovery tool can use them to recover names and file locations. When that structure is too damaged, PhotoRec searches for recognizable photo contents. It is free and runs on Windows, macOS and Linux. It accepts raw disk or partition images, including the image.dd created above.
PhotoRec recognizes file signatures and checks the data it finds. A JPEG has recognizable starting bytes, for example. This process, called file carving, can find photos without a working directory, but the results generally lose their original filenames and folder structure. Files appear under names such as f1234567.jpg in recovery folders.
Follow the developer's PhotoRec instructions with the saved image as the source:
- Open the raw image with
photorec image.dd. On Windows, usephotorec_from the extracted program folder, supplying the full image path if it is elsewhere.win.exe image.dd - Select the image's partition or data area. In File Opt, check that the photo formats you need are enabled.
- Choose Other for a normal FAT or exFAT camera card. Choose a whole-partition search for a corrupted file system rather than searching only space marked free.
- Select a destination folder outside the source image and start recovery.
- Open the recovered pictures at full size. Check the photographs you wanted, including their resolution and whether the complete frame displays.
RAW camera photos need the right file-family selection. PhotoRec's supported-format list includes Canon CR2 and CR3, Nikon NEF and Sony ARW. Some RAW formats are grouped under TIFF in the selection menu. A missing extension in a short menu does not necessarily mean the camera format is unsupported.
When recovered JPEG files are still corrupted
A file can be present in a recovery folder yet contain only part of the original photograph. If a picture was stored in separated blocks, a signature scan may find its beginning but follow the wrong continuation. Overwritten blocks and sectors missing from the image can also leave gaps. These are different problems from simply losing the filename.
PhotoRec includes a bruteforce option for trying to recover more fragmented JPEGs. Its developer describes this as a CPU-intensive operation. Keep corrupted files retains incomplete results for further work. Both options can be tried on the preserved image; they do not require another read of the SD card.
An embedded thumbnail or partly decoded JPEG can look convincing while the full photograph has missing areas. Keep the untouched recovered file when trying a repair utility, and save any repaired version separately.
If one program finds nothing, check its format selection, image compatibility and whether the image covers the relevant partition. An unsuccessful scan is not evidence that the controller has failed. A different reconstruction method may help with surviving fragments; software cannot recreate original picture detail that has been overwritten or was never captured in the image.
Recovering photos when the SD card will not read
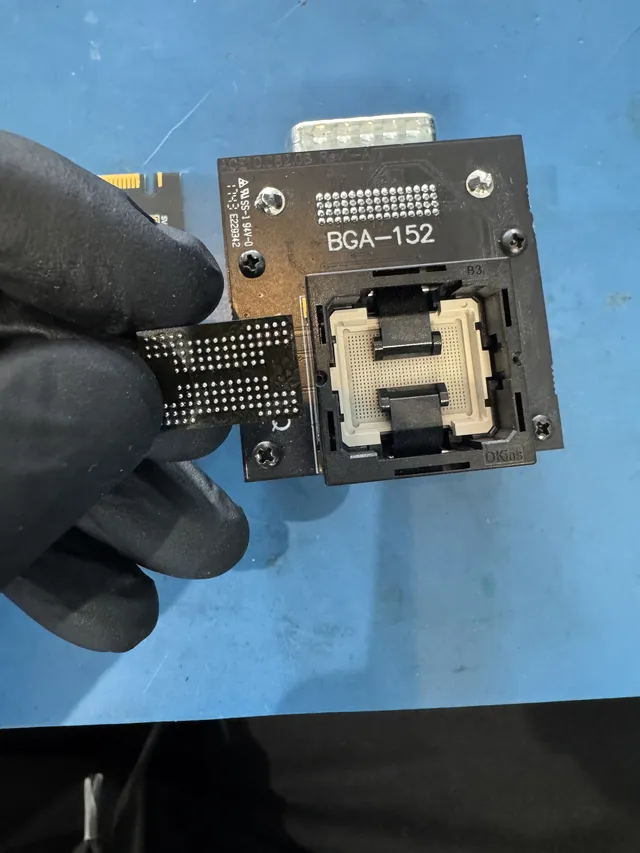
A card that provides no readable storage cannot supply an image to PhotoRec. Hardware recovery has to reach the memory through another route. Some cards have separate memory packages; others combine the circuitry in a monolithic construction, where access may require exposing small connection points beneath the coating.
In Joe's recovery of an undetected SD card, he removed coating over the data lines, wired the exposed pads to an adapter and read the memory with PC-3000 Flash. He corrected memory errors, unscrambled the dump and rebuilt its page arrangement. The reconstructed data yielded the customer's dog pictures.
That reconstruction matters because a raw NAND read contains the controller's physical page layout and error-correction information, rather than an ordinary DCIM folder. Readable memory, a supported layout and usable file contents all affect what can be extracted.
MDrepairs provides SD card recovery at its Lincroft, New Jersey lab, including mail-in work. The diagnostic costs $100 and is credited toward a successful recovery; an estimate goes to you for approval before recovery work begins.
Get help with data recovery
Bring your device to our Lincroft lab during opening hours, or mail it in.
How to mail your deviceThe $100 diagnostic is non-refundable once diagnostics start, and donor drives or replacement parts you approve are non-refundable once ordered, even if recovery fails.
Published by MDrepairs
MDrepairs is a data recovery and electronics repair lab in Lincroft, New Jersey. Our founder and lead technician Joseph Montanti films real cases for our YouTube channel, showing tools, repair steps and recovery outcomes.
Keep reading
- SD Card Write Protected? Fixes Beyond the Switch
- SD Card 'Blank or Unsupported'? Android Fix Guide
- USB Files Turned Into Shortcuts? How to Unhide Them